Showing posts with label halloween. Show all posts

Thursday, October 30, 2014

Sugar Skull Wreath

I have an obsession with Sugar Skulls... they are such a beautiful representation of the Day of the Dead, a time when deceased loved ones are remembered in Mexican/Aztec tradition.  I think I also have a fondness for Dia de los Muertos because my mother passed away on November 1st, which is when the cultural holiday begins.  I decided to forgo the traditional Halloween wreath this year to pay homage to the Day of the Dead and made a Sugar Skull Wreath.


The idea for this started when I found a paper mache skull mask at Joann's.  I painted it white and then, using a picture I found online as a guide, I hand-drew and painted the skull art.


I wanted a big, fluffy black wreath on which to showcase the skull, so I made my first mesh wreath which was much more difficult than I anticipated.  There is truly an art to working with the mesh and getting the loops just right.


The colorful burlap roses from Hobby Lobby were a perfect addition.  I love how they pull in all the colors of the mask against the black mesh.  I used some leftover orange pom pom trim from my No-Sew Halloween runner as a hanger.


Throw in my turquoise door, a few pumpkins, and some dying mums (geez, will I ever not kill a plant?!) and we're ready to welcome you for fall... 

Linking here:

Monday, October 13, 2014

Halloween No-Sew Runner Tutorial

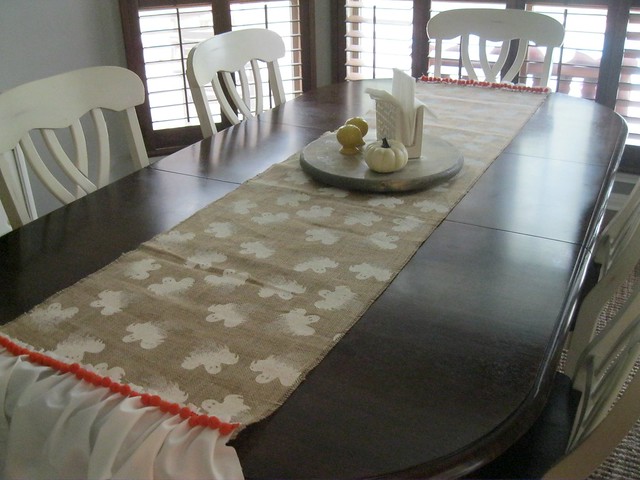
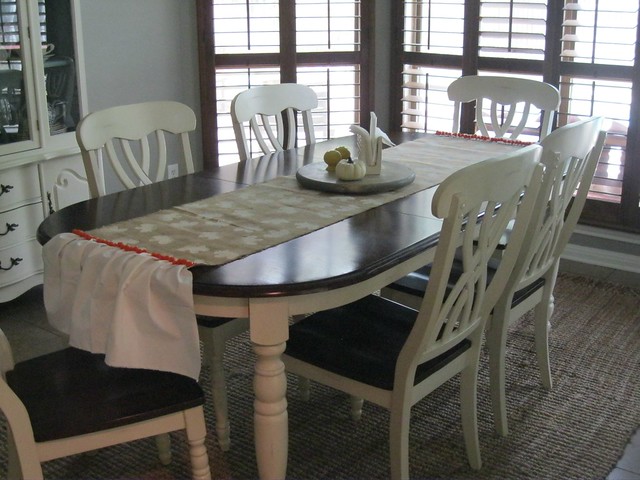
Hey there friends!  Hope you're having a great week so far... can you believe its already mid-October?  I know I can't, which might explain why I'm just now starting to decorate my home for Halloween.  I'm starting with this No-Sew Halloween Runner:


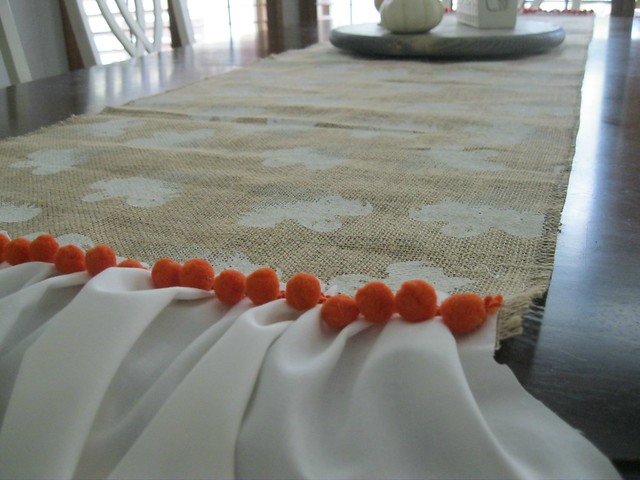
I found this great ghost-stamped burlap at Joann's a few weekends ago and knew I wanted to use it for a table runner.  I had intended to sew it but couldn't get the mojo to bring out the old sewing machine so I used the next best thing... a little hot glue.  My plan is to just spot clean as needed so the glue was a great option here.

No Sew Runner


Halloween No Sew Runner

This runner is super-simple to make:

You'll Need:
2 yards burlap (longer if you have a longer table)
1 yard white muslin (or other fabric)
pom pom trim
hot glue

Instructions:
1.  Cut burlap to desired width.  Mine is 16 inches wide.

2.  Pull burlap threads along long sides to create frayed edge.

3.  Cut muslin to desired length.  Mine is 10 inches long.  Width of muslin should be double the width of your runner.  Mine is 32 inches.

4.  Fold muslin in half to find middle of width.  Hot glue midpoint to the midpoint of the burlap.

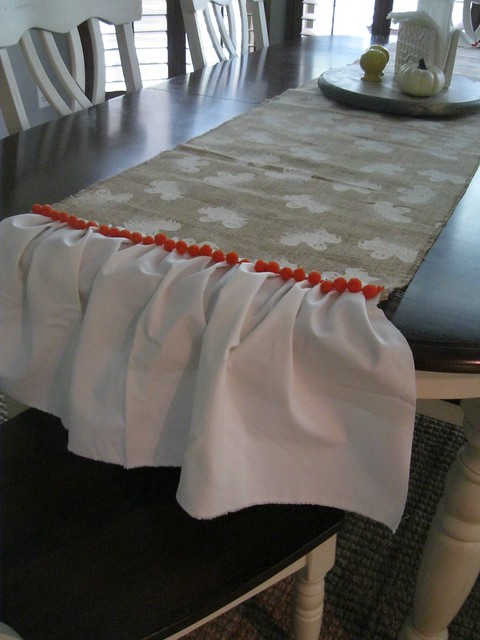
5.  Beginning on one edge, secure the fabric to the burlap with glue as you gather in even puckers.


6.  Next, hot glue pom pom trim just under the top edge of the fabric.


7.  Repeat on the opposite edge, and that's it!  Enjoy your runner!

No Sew Runner


No Sew Runner

Halloween No Sew Runner

I'm already loving my new table runner, and I love how easy it was.  I foresee more holiday no-sew runners in my future... I can already imagine some red and turquoise christmas fabric with natural burlap!

I'll be back with another Work it Wednesday post and will be sharing more details on that cute lazy susan gracing my table... make it a great week!

Linking here:
Inspiration Gallery
Inspire Me Please

Monday, October 21, 2013

Batty Halloween Wreath

Happy Monday y’all!  Today I’m sharing my Batty Halloween wreath – after a few days of rainy, gloomy weather, I finally got a little bit of sunshine so I could take some pictures!

Spooky Bat Wreath

This wreath started out completely different – my original idea that seemed so great in my mind turned out to be an epic fail so I had to go back to the drawing board.  A trip to Walgreens for some allergy meds ended in the Halloween aisle, where a new idea was born and I then proceeded to wipe ‘em clear out of fake bats.

Circling Bats Wreath

I wrapped the wreath form with burlap ribbon and secured the bats with just a few straight pins, which luckily worked because hot glue does not stick very well to whatever rubber/plastic material these things are made of.

My inner English teacher is cringing that I just ended a sentence with a preposition but hey, I’m a rebel like that.

EEK Bat Wreath

The flying bat in the center carries a Halloween message on a burlap banner… EEK!  (My daughters told me that bats don’t say eek, they squeak.  Love them.)

Spooky Bat Halloween Wreath

And now just a few more pics…

Circle of Bats Halloween Wreath


home made Spooky Bat Wreath

It’s a little batty, but a lot of fun… only 11 sleeps til Halloween!

Linking here:

Wednesday, October 16, 2013

Whimsical Witch Halloween Mantle

Morning lovelies!  I’m finally getting my Halloween on around here… I typically begin with a wreath reveal but since my wreath idea is still being tweaked, I thought I’d start by sharing my Whimsical Witch Halloween Mantle!

home.made

I kept most of the elements from my Aqua and Wood Fall Mantle and just added in some fun Halloween touches.  The inspiration was a sassy little ceramic pumpkin witch my sister gave me a few years back.

Witch Pumpkin Halloween Mantle

I dressed up some small pumpkins with decorative witch hats from the Halloween party section at Hobby Lobby – I just slid them on over the pumpkin stems for a perfect topper.  My youngest hoards saves all of her glasses when we go to 3D movies and pops the lenses out for some reason, so I took advantage of that and used them as props for my little pumpkins.  Said daughter also convinced me she needed sticky glow-in-the-dark eyeballs from the Halloween aisle, so I happily obliged and stole a few for my pumpkins (I secured them with a straight pin).

Witch Pumpkin Mantle

The purple LED lights are battery operated – which is great because we all know that electrical outlets by mantles are never close enough for our decorating needs (you know what I’m saying)!

Witch Hat Garland

I added some “creepy fabric” for some extra texture and then made a teeny witch hat garland with some leftover stash ribbon trim.

Whimsical Halloween Mantle

I’m enjoying this Whimsical Witch mantle so much that I’m already conjuring up ideas about how to modify it to keep it for Thanksgiving… wonder how long those pumpkins will last??

Hope you’re having a great week so far!

Linking here:

Savvy Southern Style

Inspire Me Please Party

The Inspiration Gallery

Fabulously Creative Friday

Somewhat Simple

Whipperberry

Tatertots and Jello

Funky Junk Interiors

Too Much Time

I Heart Naptime

Three Mango Sides

The Sunday Showcase

Home Stories A to Z

Inspiration Exchange

Power of Paint Party

The Scoop

Tuesday’s Treasures

The 36th Avenue

Transformation Thursday

Be Different Act Normal

It’s Overflowing

Beneath My Heart

Sunday, October 30, 2011

Double double, Toil and trouble...


Here we are, all decked out in our Halloween best.  My oldest daughter went as a "zombie Indian" (translation - she wanted at first to be an indian princess and decided last minute to be a zombie).  My youngest was a bride.  My awesome sister... the fabulous Cruella Da Vil.  (Tell me that's not a fantastic costume!)  And I was, of course, a witch - a good witch I might add.  (The little girl next door asked me just to be sure I wasn't a bad witch!)

We had quite the evening of trick or treating - made much more enjoyable by joining in on the dressing up.  Why should the kids have all the fun, right?!

Hope you have a Bootiful Halloween!!

Wednesday, October 26, 2011

{Tutorial} Mod Podge Witch Hat

With all of the excitement I’ve been brewing for Halloween, it seemed only fitting that I dress up for the occasion, and as a witch, of course.  A standard black witch hat wouldn’t do, though, so I’ve put a little home.made. spin on it – it’s a Mod Podge Witch Hat!

Want one of your very own?  Here’s the Mod Podge Witch Hat tutorial for you!
You will need:
  • plain black witch hat
  • Mod Podge
  • plastic shopping bag (large or several small)
  • paint brush or foam sponge
  • hot glue
  • glitter
  • black feather boa
  • sheer black fabric (chiffon, nylon, etc.); 1/2 yard
  • assorted decorations
Instructions:
1.  Crumple up your plastic shopping bag(s) and stuff the inside of your hat.
038
2.  Paint on a layer of Mod Podge to the hat portion (not the brim), shaping the hat as you go.  Allow to dry.
041
3.  Now paint on a second layer of Mod Podge, and add glitter.  (***Note – you’ll want to do this over some newspaper or other covering.  It gets messy!)
003
4.  Once dry, shake off excess glitter.
004
5.  Next, you’ll attach your fabric by running a bead of hot glue along the edge where the hat meets the brim and pressing down the fabric, being careful not to burn your fingers!
007
6.  At this point, you can either fold the fabric under the brim and glue to the underside, or you can let it hang for a veil effect.
009
7.  Using the same glue technique, add your feather boa along the seam where you glued your fabric.  Trim excess.
010
8.  Now it’s time to add your embellishments!  I randomly hot glued some sparkly beads; then I added some of these critters, cause every witch hat needs some stretch rats, right?
011
9.  I couldn’t find plain old spiders, so I used spider rings and simply cut off the ring portion, then glued on the spiders.
013
015
Love how this one’s about to crawl up my nose!  *snort*!
10.  Once you’ve embellished to your heart’s content… that’s it.  Put your hat aside until it’s time to get your costume on!  (And fyi, I will have pictures of my full costume ~ hat included ~ after Saturday’s Halloween bash!
Hope you’re able to use this tutorial to make yourself a fun new witch hat – Have a Spooktacular Halloween!!


Linking up here:

Thursday, October 13, 2011

{Tutorial} Halloween Ghost Tea Towel

Have you noticed yet that I'm going a little ga-ga for Halloween this year?!

Luckily for you, that means more fun projects to come!  After sprucing up my entry and my dining table, I thought my kitchen needed to share in on the spooky fun, so I whipped up these cute little Halloween towels.


Want to make your own??  Here's the tutorial!

What You'll Need:
White Flour Sack Towel or other White Towel
Black felt
1/4 inch knit elastic
scrap ribbon
fabric marker
measuring tape


1.  Unfold your towel and turn it wrong side up (aka seam side up).  Using your fabric marker, make a mark every three inches along the bottom of the towel seam.


2.  Next, measure six inches from the edge of the towel and repeat marking every three inches.


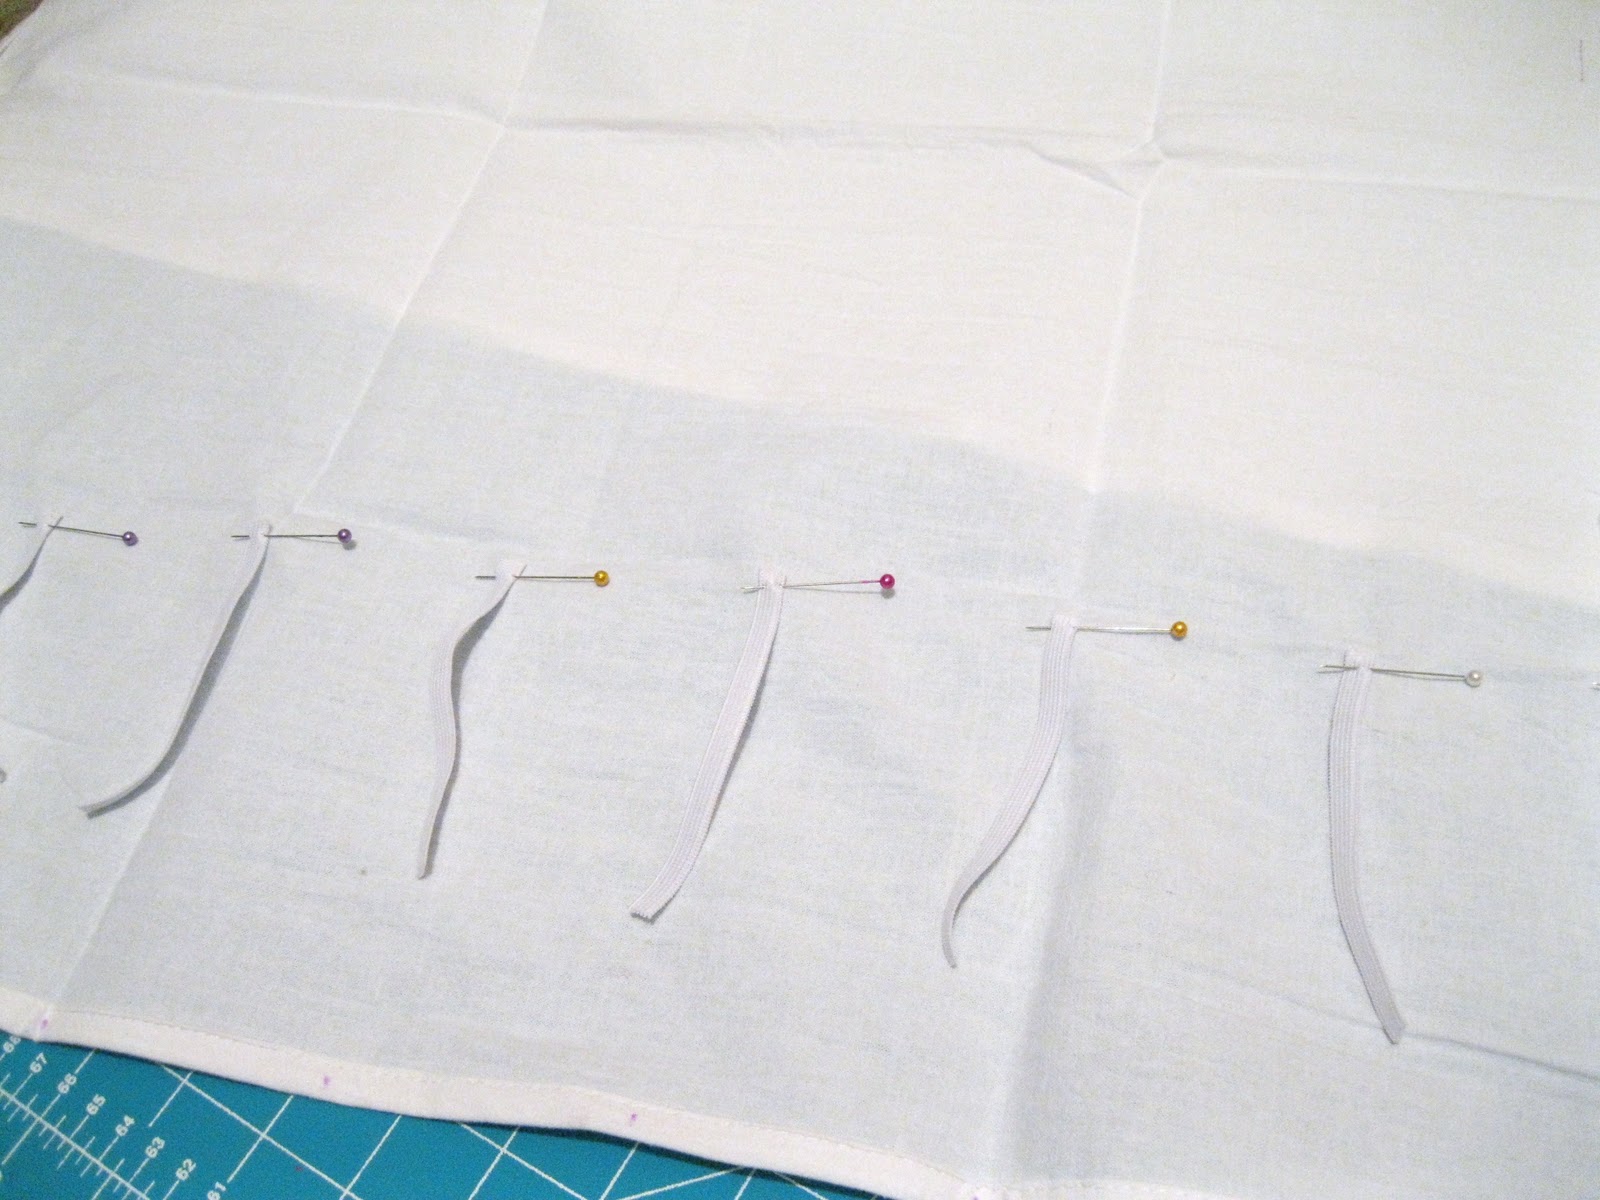
3.  Cut your elastic into 4 inch strips.  I used a 27" inch wide towel so I needed nine of these.


4.  Pin the elastic to your six inch marks.


It will look like this once you've pinned them all.


5.  Now it's time to sew!  Using a straight stitch, sew over your pinned edge of elastic, backstitching a few times to reinforce the edge.


6.  Now, stretch your elastic to your seam-edge marking and hold in place with your finger as you sew.  (You can pin here if you want but I found it much easier to just hold it in place and stretch as I sewed.)  Secure the other end with a backstitch.


7.  Repeat this step for all of your elastic pieces - it will look like this when you're done.  (Don't be alarmed if the edges roll - they easily straighten when you fold the towel later.)


8.  Now, cut out two oval eye shapes and a smaller oval mouth shape from your black felt.  (I freehanded this, but if you want a template, I can make one for you... let me know!)


9.  Pin in place on your towel.


10.  Sew around your felt pieces to secure to the towel.  I used a straight stitch but you can use a zigzag or satin stitch if you'd like.


11.  And that's it!  Add a little bow for a ghoul  girl ghost or leave as is for a boy version!


Now, go hang your new spooky hand towels in your kitchen (or bathroom... this works well there too!)


Linking up here:

HookingupwithHoH


LinkWithin

Related Posts with Thumbnails