Thursday, November 29, 2012

{Tutorial} Knock-Off Ballard Designs Advent Pillow

I recently received the holiday edition of Ballard Designs’ catalog in the mail.  Amidst all of the gorgeous pages of holiday décor was this Advent Pillow:
advent
Cute right?
Apparently a lot of other people think so too, because it looks like it’s already no longer available…
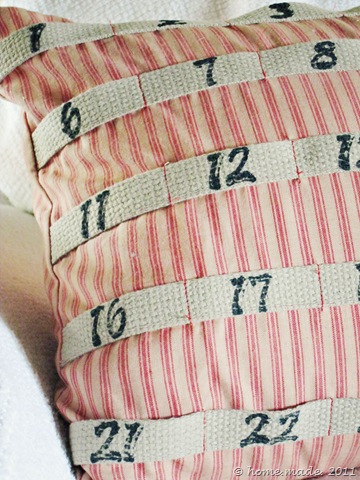
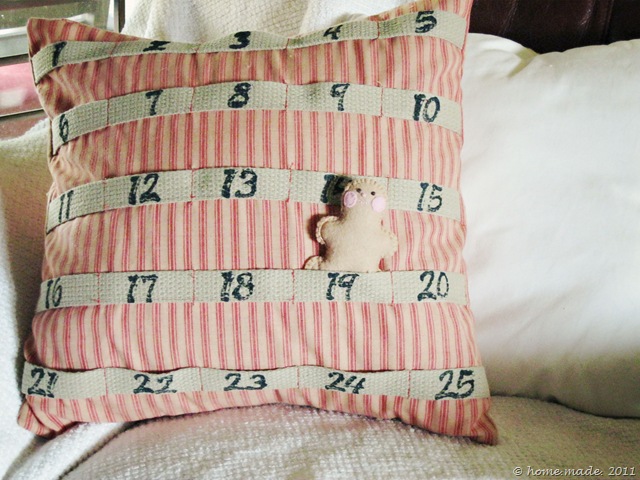
What’s a girl to do?  In this case, make one!  I present my version of the BD Advent Pillow:


Want one for your very own?  Here’s the how-to!

You Will Need:

  • 1 yard fabric (I chose a cotton ticking stripe)
  • 2 yards cotton webbing (found in the ribbon section of your fabric store)
  • 16 x 16 pillow insert
  • Number stamps and fabric paint (or number stencils), paintbrush

Instructions:

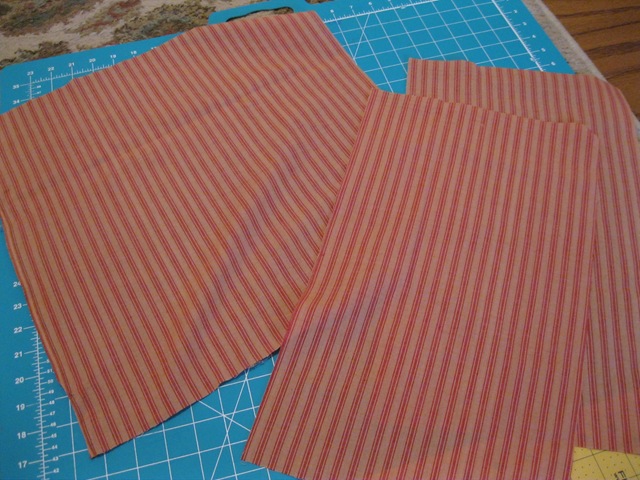
1.  From fabric, cut one 17” x 17” square and two 17'” x 10” rectangles (be sure to match direction if using stripes)
004

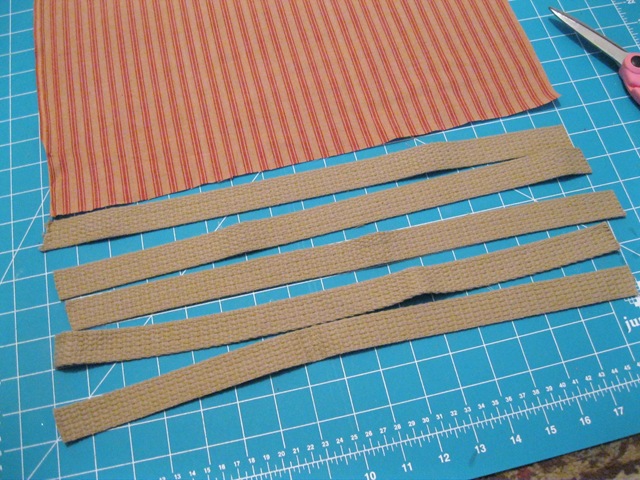
2.  Cut five pieces of webbing, each 17” long.
011

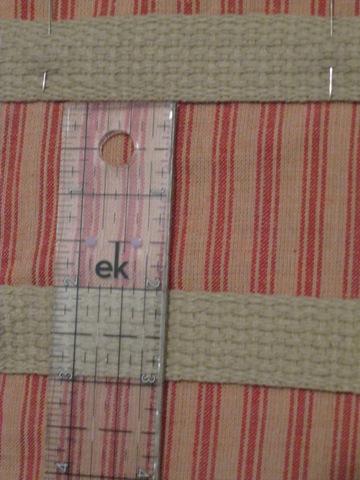
3.  Measure two inches from top of 17” x 17” square and line up top of your cotton webbing.  Pin in place.  Then measure two inches from bottom of webbing and line up top of next strip.  Pin.  Repeat for remaining strips.
013                      
4.  Sew along bottom of each cotton webbing strip as close as possible to the edge.  I used a straight stitch.
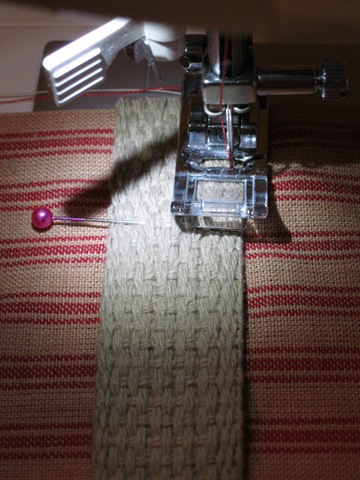
 015

5.  When you are finished, it will look like this:
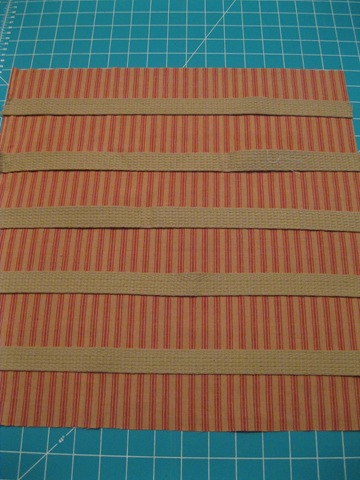
012

6.  Next, you are going to measure across to mark your “pockets”.  Measure in four inches from the left edge and mark.  Measure three inches and mark (three times).  I found it easier to mark all pieces of webbing at the same time to help keep the pockets in line.
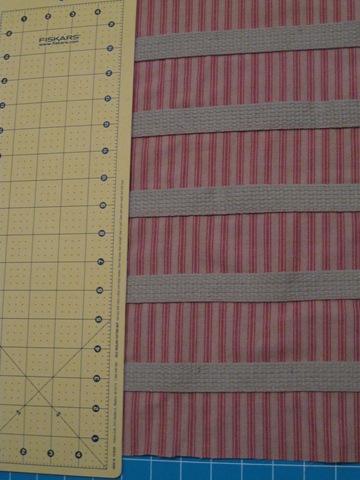
017

7.  Sew along each line, stay-stitching on each end of the webbing for reinforcement.  The easiest way to do this (rather than snipping threads after each time) is to complete one vertical seam, pick up your sewing needle and pull through fabric to the next line and repeat until all five vertical seams are sewn.  Then repeat for the next column.
(See in the pic how the thread connects in between the webbing?  You’ll snip it later, so no worries.  This will save you a ton of time!)

018

8.  Once all vertical pockets are sewn, it will look like this:
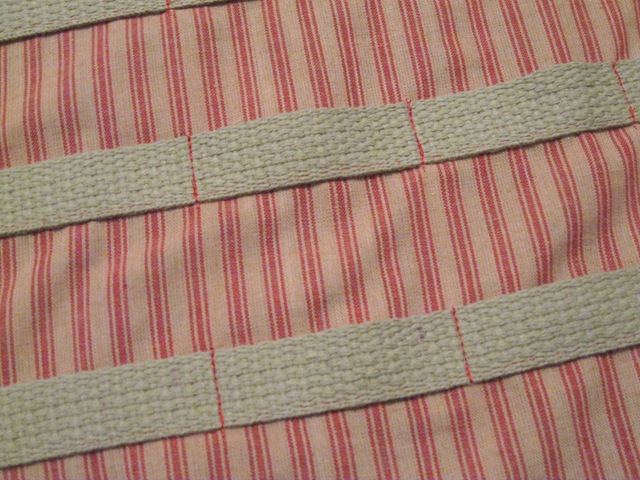
019

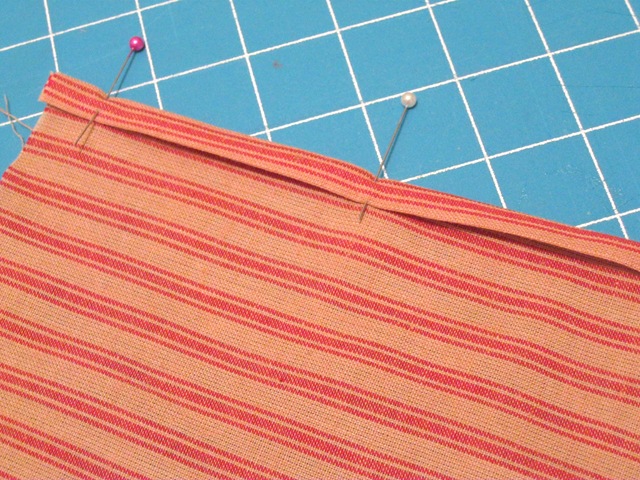
9.  Now set this piece aside and lets work on the back pieces for the envelope closure.  On the long end of your rectangle (WS), fold in edge 1/4” and press.  Fold this in again 1/4” and press, then pin.  Repeat for other rectangle, then sew along each seam using a 1/8” seam allowance.
001

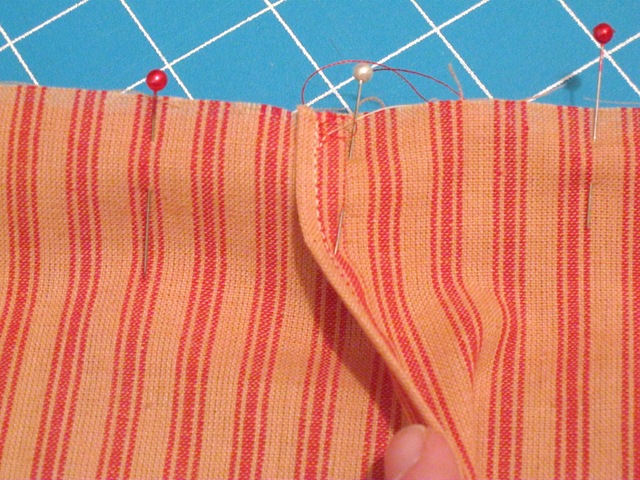
10.  Now it’s time to assemble your pillow cover.  Lay the 17” x 17” rectangle RSU.  Line up 17” x 10” rectangles with the edges WSU.  These pieces overlap as they will form an envelope closure.  Pin along outer edges.
002

11.  Using a 3/8” seam allowance. sew along outer edges, stay-stitching over the overlapping seams for extra reinforcement.  Trim threads and finish raw edge with a zigzag stitch, serger, or pinking shears.  Turn right-side out and press.  (Sorry, I don’t have a picture for this part…)

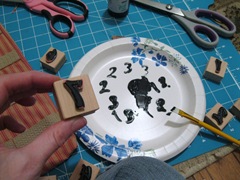
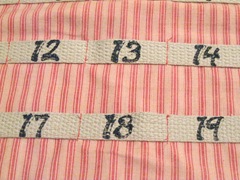
12.  Now it’s time to put on your numbers!  I used wooden stamps and black fabric paint, then hand-stamped the numbers to the center of each “pocket”.  Note – the stamps work better if you brush the paint on with a paintbrush rather than coat it as if in ink.  Trust me, I learned this the hard way. ';)  If you’re worried about your paint bleeding through, place a piece of heavy card stock or cardboard inside your cover.
004                                  005

13.  Allow paint to dry and that’s it!  Now find something to use as your Advent pillow marker.  I used a felt gingerbread man, but  you can use a candy cane, or a small Christmas cookie cutter, whatever you like.
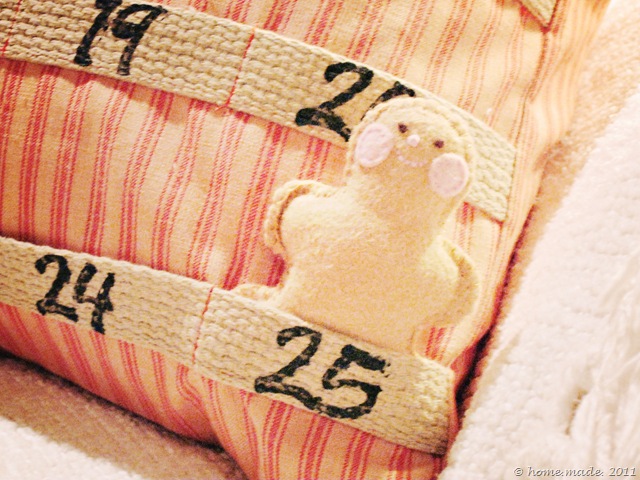


Hope you enjoyed this tutorial and that you make one of these pillows to help count down the days until December 25th!!


Linking up:
Whipperberry
Craftberry Bush
Tatertots and Jello


Days of Chalk and Chocolate
Home Stories A to Z


Wow us Wednesdays

The 36th Avenue
Scraps of Life
Keeping the Christmas Spirit Alive
Somewhat Simple

Tuesday, November 27, 2012

Christmas Stocking Ideas

Are your stockings hung by the chimney with care already?  Just in case they're not, and you're in need of some sweet stocking ideas, I've rounded up some of my faves... enjoy!


Love the ruffles and the stamped print on this one.


Super soft minky and jingle bells... a great combo!


Classic quilted stockings in unexpected colors...


This bright yellow jester stocking is so fun!


Burlap grain sack... *sigh*.  This is my perfect holiday mantle!


And lastly, precious ruffled white linen.  Lovely.

Saint Nicholas will soon be here... so get ready!


Sunday, November 25, 2012

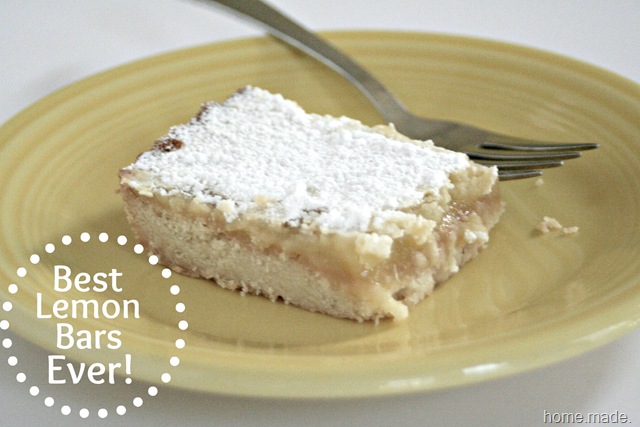
{Recipe} The Best Lemon Bars Ever!

Happy Sunday friends!  I wanted to share a recipe with you for the dessert I took to our family Thanksgiving this year – home.made. Lemon Bars!

best lemon bars

Lemon Bars

Crust:

  • 2 cups Flour
  • 1/2 cup Powdered Sugar
  • 1 c. softened Butter (no margarine)

Blend first 3 ingredients.  Press into GREASED (I use spray on non-stick butter spray) 9×13 pan.
Bake @ 350 for 25 minutes.

Filling:

  • 4 beaten eggs
  • 2 cups Sugar
  • 8 tablespoons Lemon Juice
  • 4 tablespoons Flour
  • 1/2 teaspoon Baking Powder

Mix all ingredients together.  And then pour it over COOLED crust.
Bake @ 350 for 25 minutes or until filling is set.

Dust the top with Powdered Sugar to finish.

Enjoy!!

lemon bars


Friday, November 23, 2012

Dark Tray Ceilings

Hi friends!  I hope you had a wonderful holiday yesterday and that your turkey coma is almost over!  Maybe you're out there shopping with the rest of the crazies... if you are, I applaud you.  I, for one, can not hang with the Black Friday crowd.  I've accepted this and am perfectly okay with it.

So what am I doing today?  Painting, painting, painting, decorating for Christmas, and then more painting!  As is the norm around here, my Master Bedroom makeover has turned into quite the project.  I started with painting the ceiling and tray ceiling.  I was just about to be done with painting the walls but I RAN OUT OF PAINT!  Don't you hate that?!  I have a little more than one wall and some cutting in to do and that's it... guess I'll be heading out today during the Black Friday madness for some more paint.

As I rolled on the new paint color (Revere Pewter by Benjamin Moore, color-matched at the Home Depot), I also soon realized that what I thought was off-white trim was really a light light tan color, sooooo looks like I'll be repainting trim as well.  See what I mean about this turning into quite the project?

All that aside, let's get to the real reason for this post... Now that I've brightened the ceiling and drop ceiling with white paint, I'm toying with the idea of a dramatic dark ceiling inset.  Here are some of the ones that caught my eye:


What do you think?  Aren't they fabulous?

Maybe I should pick up a sample of a dark shade and try it on for size??  Let me know your thoughts!

Thursday, November 22, 2012

Happy Thanksgiving!

From my home to yours... many warm wishes for a wonderful Thanksgiving holiday!


Sunday, November 18, 2012

Master Bedroom Redo Inspired by Life In Grace

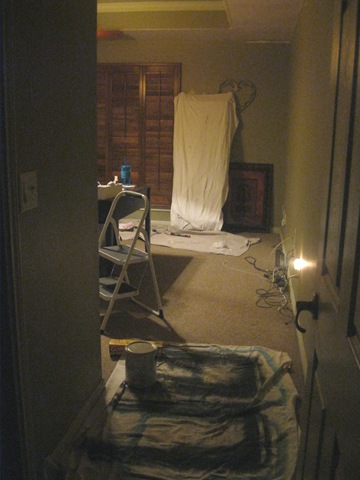
You know your man loves you when he comes home to this and is totally okay with it:

015

Um, yeah.  That would be my master bedroom, covered in drop cloths and stuff since I got a wild hair this weekend and decided to paint this room once and for all.

Our room is still the same olive green color that it was when we bought the house two years ago.  At first, I didn’t mind it because our stuff “went with it”, but over time it has become dark and dreary and I was ready to lighten things up a bit.

009

Plus, everything was olive green.  The walls, the tray ceiling… and even the inset on the tray ceiling, except for one special touch (wait for it)… crackle finish.

Hell to the yeah.

014

Anyway… it’s time for all of the olive green-ness to go.  I’m ready to open up the space visually with a clean, white ceiling and some greigey walls.

I’ll admit that I have yet to complete my oldest daughter’s bedroom makeover… and my office/game room makeover… and my kitchen and laundry cabinet overhaul.  Oy.  But I’m putting all of those off a little longer to focus on this space, especially after reading Edie’s take on it during her 31 days of Hospitality series.  Ever since I read her post, I’ve been thinking about making over this room because what she said struck a chord with me.  The most important relationship of my family begins in this room and it is the one that has been sadly neglected for the past several years.

Soooo… I decided I’m doing something about that.  It started today with my fave ceiling paint.  Then will come freshly painted walls, some new linens, a dresser that I’m dying to show you… and of course, a date night that I’ve already booked with a new babysitter.

Let the Hospitality in the Bedroom begin!

Friday, November 16, 2012

13.1–My First Half Marathon!

If you’ve been following along with 13.1 Thursday posts, you know what I was doing on Sunday… running my first half marathon!  photo (23)

This is me and my big sister immediately before the run in the sea of people waiting to start.  We were in corral 25, and it would be another thirty minutes before we even crossed the start line.

photo (14)

This would be the other almost 20,000 people waiting with us to start.  I think the amount of people was one of the hardest things for me – it didn’t feel like a run.  It felt like a stampede!

We finally began around 8am.  The first 3-4 miles were hot as the sun was coming up and the clouds had not yet rolled in.  The first 3-4 miles were also a wall of people that I struggled to get around so I could work up to my running pace.  It was frustrating, to say the least. 

I’m no speed demon, and I was run-walk person with a lot of others… but I can’t tell you how difficult it was to be running at a good pace and then have the person in front of you just STOP to walk.  No making their way to the side, no warning… just BAM!  And then I’m trying to hurry up and get around them before I plowed them over…

It was so hot and humid – did I mention that already?!  November in Texas is pretty unpredictable and while a cold front came in and the temps were in the fifties the day after the race, we ran in mid-70 degree temps with 90% humidity.  I was eagerly anticipating every water and gatorade station!

After fighting the mob of people, I felt pretty good again around mile 8 and began lengthening my running intervals so I could make better use of my running time and get around more people.  That lasted until I had about a mile and half to go… physically I was exhausted. 

And then… thank God for the cheering section!  I have no idea who the people were, but their screams of encouragement were what did it for me at the end and gave me the extra push I needed to get to the finish line.  I crossed the finish at 2:34 – not a record-breaker by any means, but not too shabby for my first foray into long-distance running after the age of 18!

photo (2)

The finish was what I came for anyway, right?  And my big sis – who was celebrating her 38th birthday by torturing us with 13.1 miles! 

After spending two days walking like an old lady… I am happy to report that I am feeling good and taking it easy and that it no longer takes me five minutes to get out of a sitting position.  Will I ever run another half?  Hmmm.  Never say never, but for now, this gal’s happy sticking with shorter distances…

Turkey Trot, anyone?

Wednesday, November 14, 2012

Winner Winner!

True Random Number Generator  3Powered by RANDOM.ORG
We have a winner!!  Congratulations Aunt TT... check your email for more details!

Sunday, November 11, 2012

Pillow Talk EBook Giveaway–extended one more day!

In celebration of finishing my first… and probably last, half marathon today, I’ve decided to extend the giveaway one more day while my aching joint recover!!

So, what are you waiting for?  Enter for your chance to win here!

Saturday, November 10, 2012

Thanksgiving Craft Round-Up!

Can you believe that Thanksgiving is less than two weeks away?!  Geez - where did the time go?  I have to admit... I haven't even changed out my wreath yet from Halloween.  Shameful, I know.  

Luckily all of you other fabulous people in blogland are quick on the turkey stick and are whipping up some fantastic projects for Thanksgiving.  I'm sharing some of my faves with you today... enjoy!  (And gobble gobble!)


Love this pine cone and burlap garland!


Doesn't everyone's mantle need a sweet little pilgrim pal?


This cornucopia is made from a waffle cone - genius!


These paper turkeys would make great placeholders for Thanksgiving Day!


I adore these folded paper leaves - wouldn't these make a great garland as well?


And finally my favorite of all... love these fabric-dressed styrofoam balls that look like pine cones!  These would be pretty in my dough bowl!


Hope you enjoyed this roundup and can get your craft on this weekend!!

Thursday, November 8, 2012

13.1 Thursdays–Race Week!

thirteen

It’s here, peops.

We are at T minus three days until the 1/2 marathon!

Tomorrow morning’s run will be the last of the preparatory miles I’ve logged over the past few months as I’ve gotten this 35 year old body ready for the longest run of my life.  Tomorrow will be an easy three miles, just enough to remind my legs of what they’re supposed to do on Sunday, so it should be fairly enjoyable.

This week I’m focusing on staying hydrated and eating well, in addition to trying to keep my nerves in check.  I have to admit it – I’m scared.  I don’t know why, but I am, so I’m trying to stop getting myself worked up over something as silly as a couple (ha!) of miles.

In the week leading up to the race, I ran 4.5 miles on Saturday and 4 on Tuesday.  There are arguments for and against tapering runs the week prior to a 1/2 or a full marathon… I chose to taper, mainly out of necessity since my hubby works every other weekend and I knew I’d have trouble fitting in a true long run.

So, how do I feel otherwise?  I think I’m ready, as ready as I’m going to be at this point.  As long as I finish, I’ll be happy.

Let’s rock this Rock n Roll 1/2!!

Tuesday, November 6, 2012

{Giveaway} Pillow Talk e Book!

Have you ever swooned over the gorgeous pillows gracing the pages of the Pottery Barn catalogue, Ballard Designs, etc. and then nearly passed out when you looked at the price?!  Me too!  And chances are, if you’re like me, you’re entertaining the ideas of just making those pillows yourself because it’s so much more affordable…
Where to start, you ask?  Look no further than this fantastic e Book from our friend Shelley at Custom Slipcovers By Shelley:
In it, you’ll learn how to make not just one, but FIVE different pillows!  Not only that, but Shelley will hold your hand while you master the art of adding piping and zippers for a truly custom look.  Wouldn’t you love to be able to make some pillows like these?
Pillow Talk is available for instant download for only $20 – such great value for your dollar!
Photobucket
Or if you’d rather just have it for free…Shelley is giving away a copy of Pillow Talk to one of you lucky dogs!!!  To enter, just leave a comment below!!  That’s it!
Rules:  Giveaway ends on Sunday, November 11, 2012 at midnight.  Winner, to be selected at random, will be announced within 48 hours.

Good luck!!

*** Don't forget to leave me your email address if you're an anonymous poster - otherwise how will I be able to identify who wins? ***

LinkWithin

Related Posts with Thumbnails