


Around our house, Dad's the word, and not just because Father's Day is coming up. My girls LOVE their daddy (as do I)... so I thought I'd dress my door with a little something for the man of the house. Better yet? You can make one too! Here's how:
You Will Need:

Styrofoam Wreath Form
White Button-Down Men's Shirt (I thrifted this one at Goodwill for $1.oo)
Jute twine
D, A, D letters (mine are foam but you can use wood, chipboard, whatever!)
Paint and Mod Podge
Fabric for a bowtie (or the real thing, if you have one) I used the Bow Tie Tutorial from A Lemon Squeezy Home to make mine.
Hot Glue
Ready? Here we go!
1. The first step is a little tedious, but so worth it. Wrap your wreath form in the jute twine, securing with hot glue as you go. (I spent an hour doing this, while watching Deadliest Catch. Good times.)

When you're done, it will look like this:

2. Take your wreath form and lay it on top of your men's shirt, with the top of the wreath form at the top of the collar. Cut off the bottom of the shirt about two inches below where the bottom of the wreath lies.

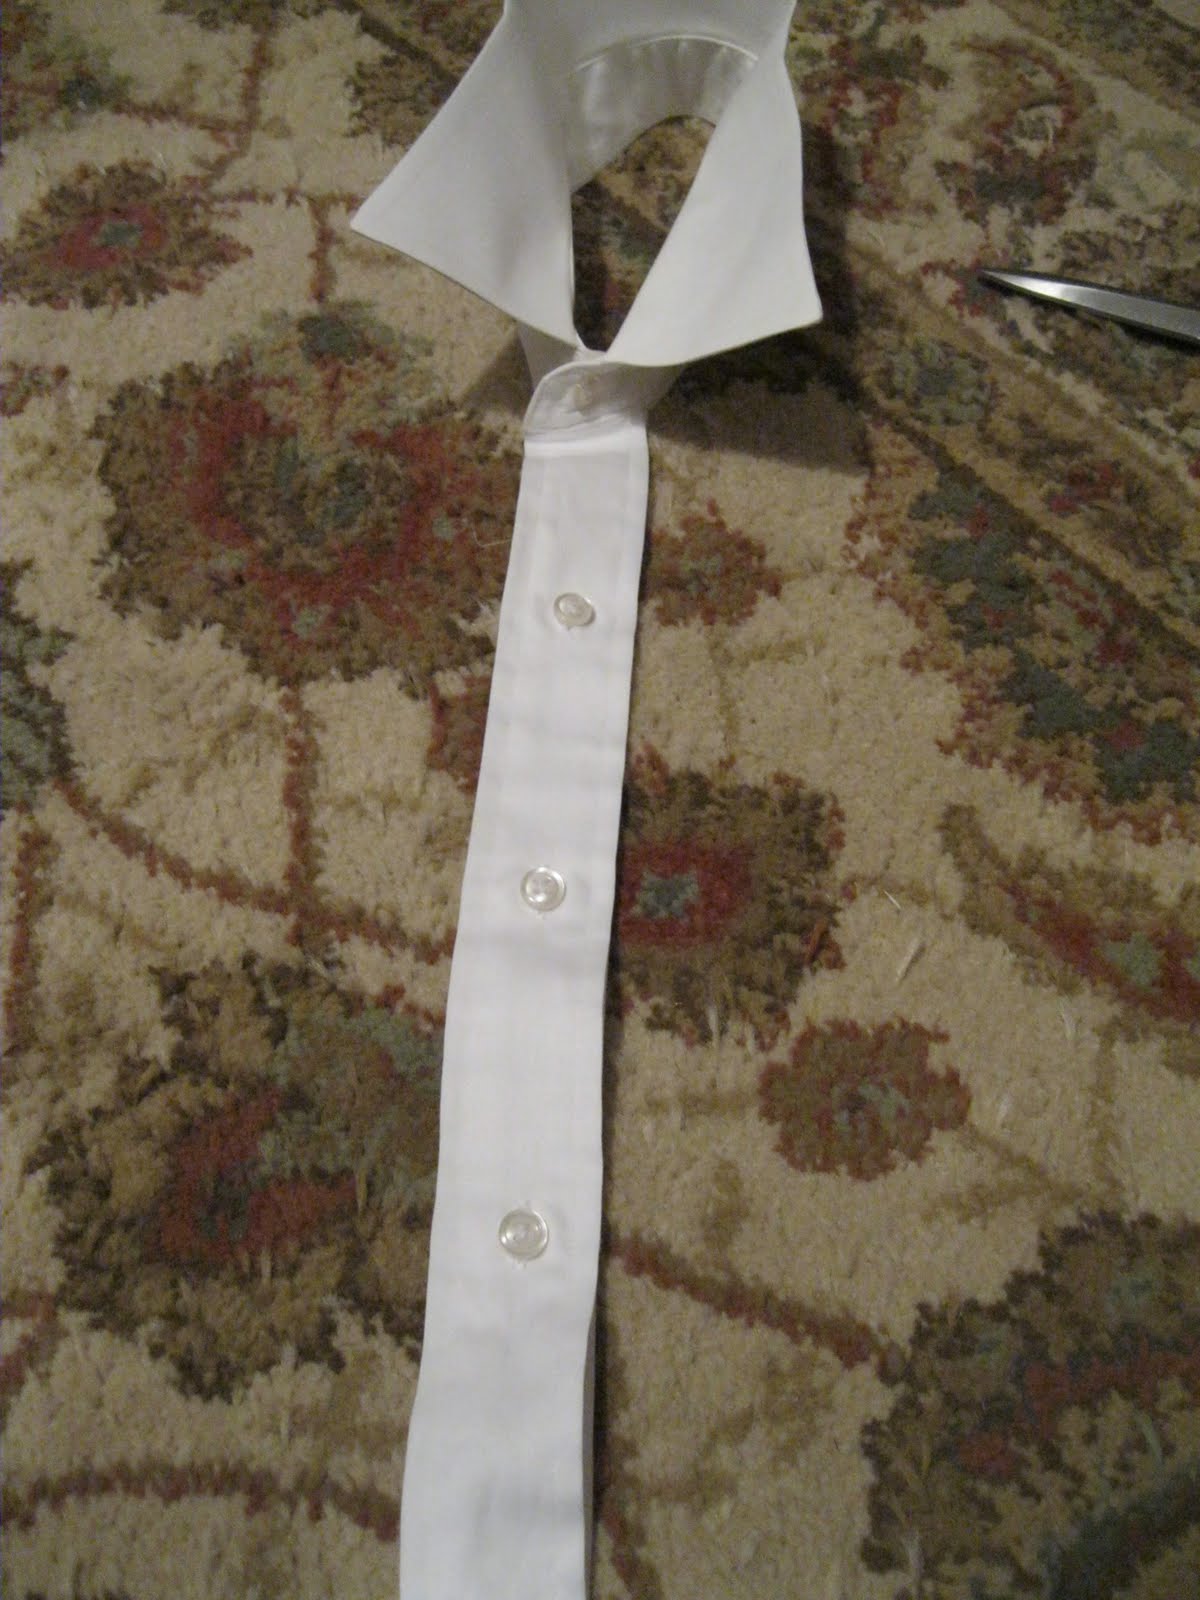
3. Now, carefully cut along the button placket towards the collar, following the seam as closely as you can.

4. When you reach the seam where the collar is joined to the front of the shirt, continue cutting along seamline around collar. (Be sure to cut on the bottom collar seam - you want it to be able to fold over later.)

5. When you reach the seam for the opposite button placket, cut down it along the seam as with the other side. It will look like this when you're done.
Set this aside until later.
6. Now you'll want to decorate your DAD letters. I painted mine with some turquoise blue acrylic paint (adding a coat of Mod Podge once it was dry for shine.) You can mod podge fabric if you like or do glitter. Be creative!


7. While you're waiting for those to dry, now's the time to make your bow tie (if you're making one). I had this polka dot Amy Butler fabric left over from my March Bag - it was screaming to be made into a bow tie! Christie's tutorial was easy peasy (as promised) and I whipped mine up in about 15 minutes. (I improvised a little, using hot glue to secure rather than stitching and velcro, seeing as this wasn't going to be a functional bow tie.)

Cute right?!!
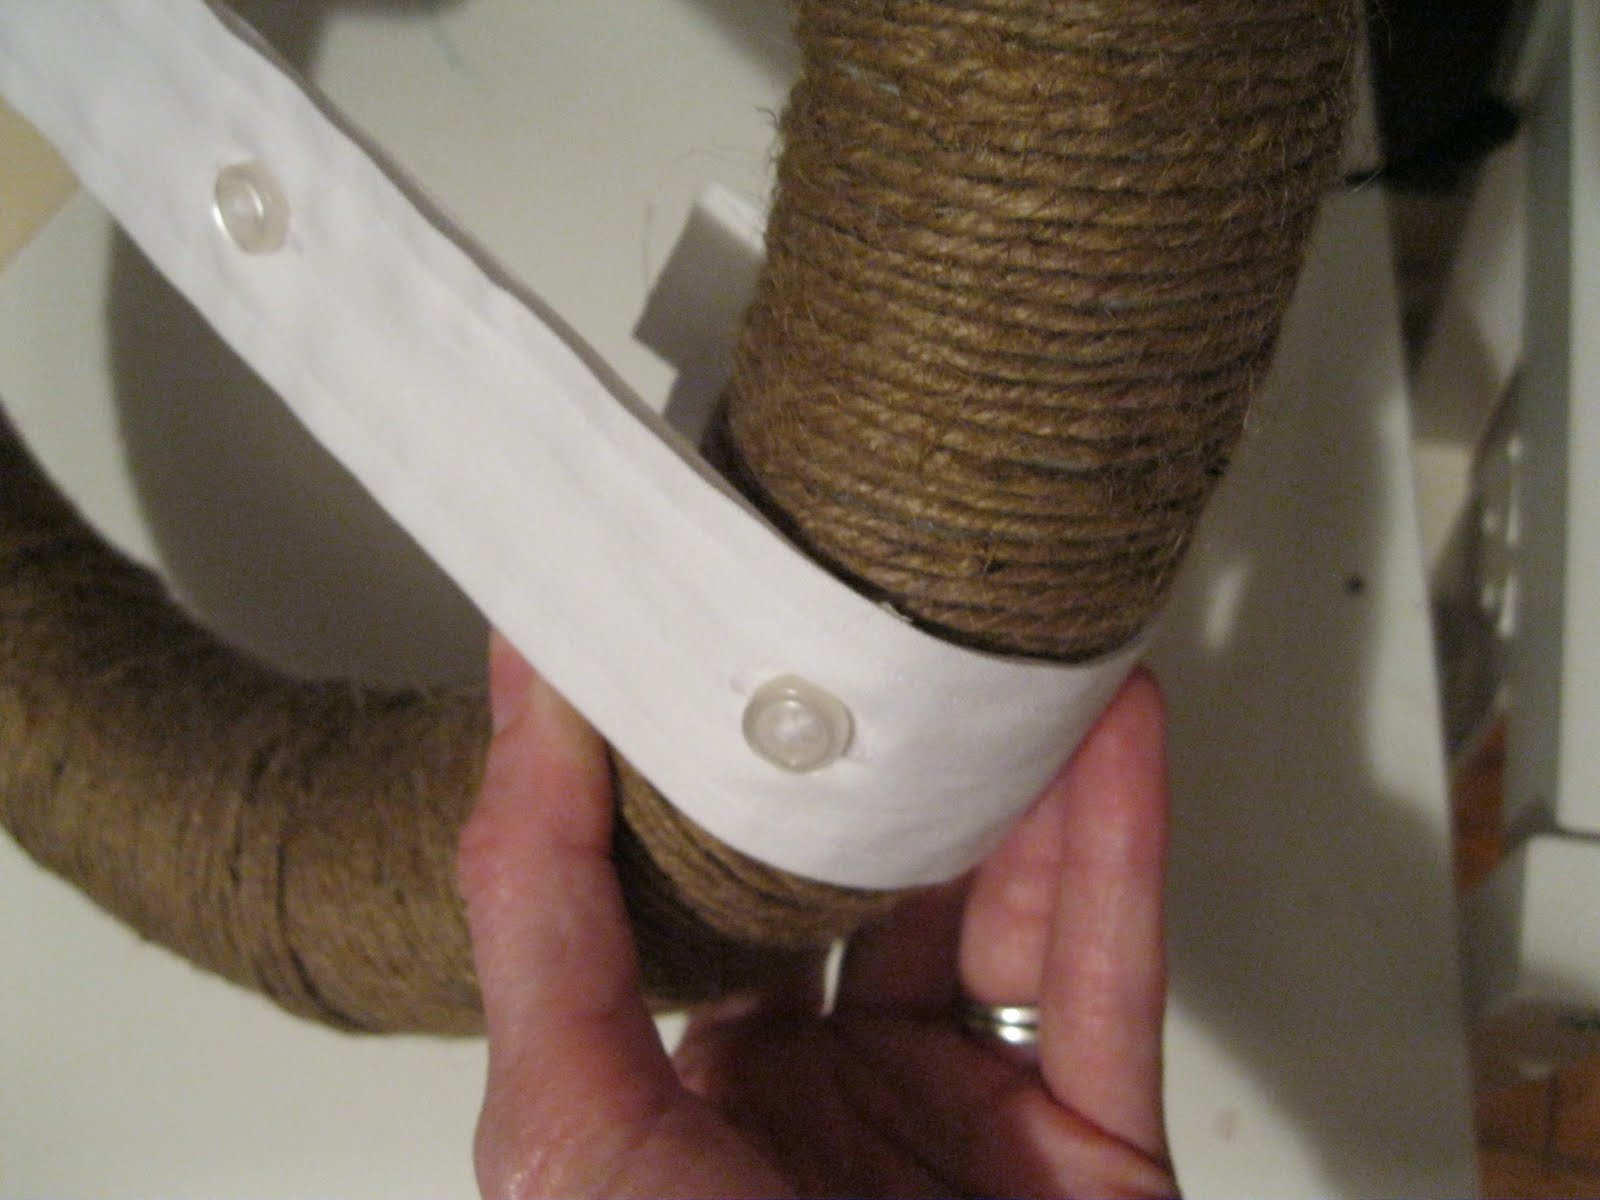
8. Alright, time to get dressed. Put your bowtie on the shirt collar and fold collar down. Then center your collar over the wreath form.

9. Secure back and front sides of the collar to the wreath with hot glue.

9. Pull your button placket straight down and center on the bottom portion of the wreath, wrapping around the circumference of the wreath. Secure with hot glue.
10. You should now have an almost finished wreath!

11. Now it's time to add the letters. Place them on your wreath to your liking and hot glue those bad boys down.

12. And you're done! Easy, right? Now go hang this on your door to say Happy Father's Day to all who enter!
*** I added a ric rac boutonierre later (tutorial to soon follow) ***


Hope you have a Happy Father's Day with the man of your house!
Linking up with Today's Creative Blog and House of Hepworths!


Very cute Rhonda!! Love the use of the Goodwill shirt!! How creative!
ReplyDeleteI love this wreath!! What a great way to celebrate Dad all month long. This is definitely going on my craft bucket list. I am linking to your post on my blog http://analoglovesdigital.blogspot.com/2011/06/20-fabulous-fathers-day-gift-ideas.html
ReplyDeleteI absolutely love the creativity of this adorable wreath! And the boutonniere is WAY CUTE...the perfect touch. :)
ReplyDeleteHugs,
Jessica
Very pretty, I love your post... And would like to make it for my father...
ReplyDeletewow what an awesome idea. I'm excited to make one for my hubby! Hopefully I can talk the kids into helping as well. I just love your blog and I joined it. :)
ReplyDeletewww.findyoursparkle2.com
how much twine do you think you used? (in yards...)
ReplyDeleteThis is awesome and hilarious! I just love it! HOpe you will hop over to my under 300 followers blog hop @ http://pinkapotamus.blogspot.com/2012/05/under-300-followers-blog-hop-3.html
ReplyDeleteI am your newest follower~
xoxo
Amie @ Pinkapotamus
Oh my gosh I am dying over the cuteness. Facebooked, tweeted and pinned it out!
ReplyDeleteThis is AHHHdorable!!!!!
ReplyDeleteThis craft was so awesome it inspired me to do my own! I linked backed to you.
ReplyDeletehttp://honeysuckleonthevine.blogspot.com/2012/06/normal-0-false-false-false-en-us-x-none.html
I LOVE this wreath! Hi my name is Melissa and I'm the editor for FaveCrafts.com. I'd love to publish this project on our site...I think our readers would love it! You can contact me at mconner@primecp.com for more information! I look forward to hearing from you :)
ReplyDeleteFather's Day is approaching and my Daddy is the one man I can has always been there for me. I love him more than any man I have ever known. Sadly to say, he died a few months ago it has ripped my heart out. This wreath has made my day! I cannot wait to make it to put on his grave for Father's Day. I have been making flower arrangements for his grave because I promised him as long as I was alive it would always stay beautiful. I get frustrated with making the arrangements because I miss him so much. At times I wish I could throw away the flowers and just pick up the phone and call him. I miss him so much. I was an only child and definately "Daddy's little girl". Thank you for the tutorial. It is awesome!
ReplyDelete