Monday, January 30, 2012

Valentine’s Ruffled Burlap Garland

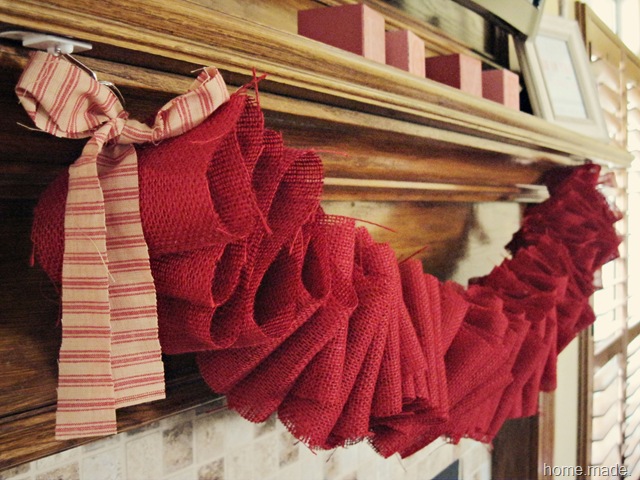
I’m starting to come down from the Christmas coma around here and throwing in a little V-Day décor.  I began with an easy burlap garland for my mantle, inspired by this ruffled linen garland at Beautiful Nest.

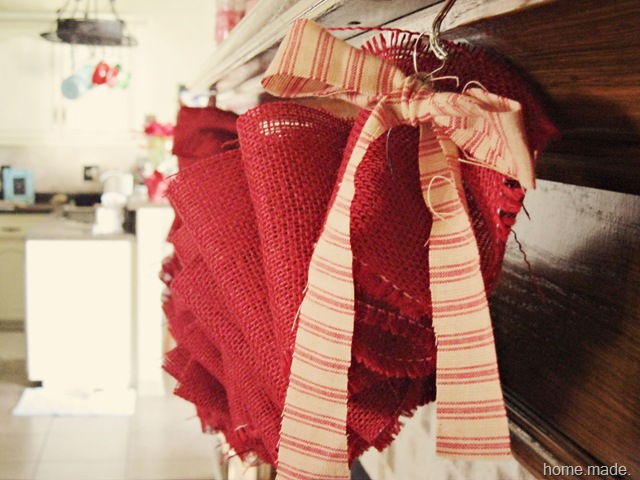
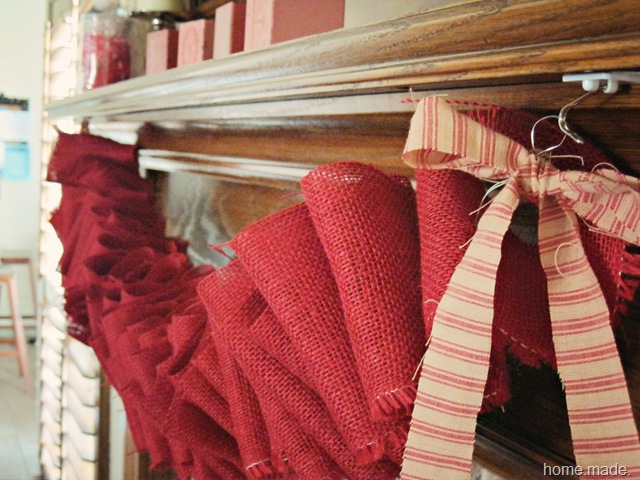
Instead of linen, I cut some strips of budget-friendly burlap in Valentine’s red, and then strung it on some jewelry wire, ruffling as I went.

I added some ticking stripe fabric bows to the ends to finish it off…

I’ve got a couple more things adorning the mantle that I’ll share later… but then again, maybe not.  Have you ever tried to get a good mantle pic with a big TV in the middle of it?!

The things we do for love, right?

Hope you’re having an awesome week!

Friday, January 27, 2012

One Month - I Won It!!

I could not believe my eyes this morning when I saw that the Season 7 winner of One Month to Win It was... ME!! 
SHUT the front door!!

Thanks again to all of the fabulous ladies who put together this fun blog event and to all of the contestants... it was such an honor creating with you over the past four weeks.  In case you missed any of the OMTWI, head on over to check out the other fabulous projects!

Here's where my French Grain Sack Dresser is being featured:

Thursday, January 26, 2012

French Grain Sack Dresser

So, now that voting is closed, I can let you in on my furniture project!
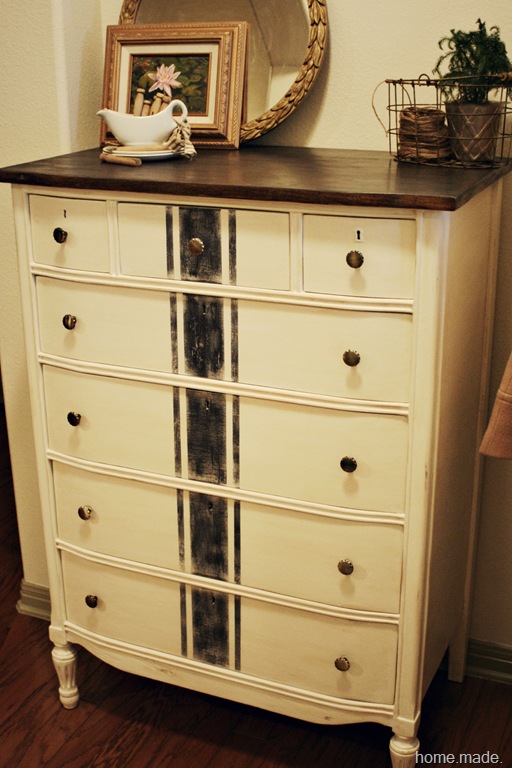
This final round was the furniture round, and I couldn’t wait to get started on this piece.  I picked up this Craigslist dresser on New Year’s Day… for fifty bucks (score!).  I wish I’d have remembered to take pictures before the stripping and sanding began, but just picture layers and layers of yellow and tan paint, if you need a visual…  Hopefully, the end result will make up for it ;).
036 copy
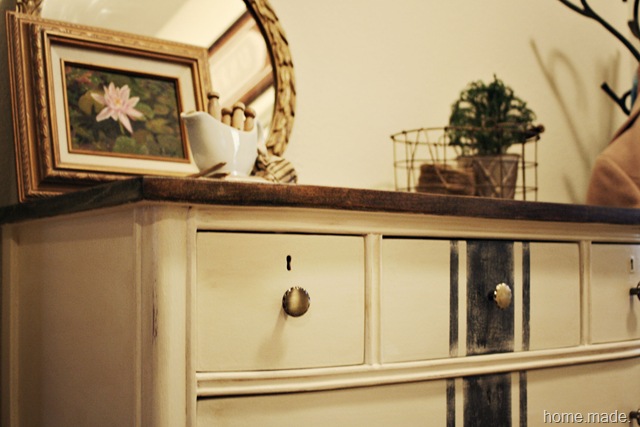
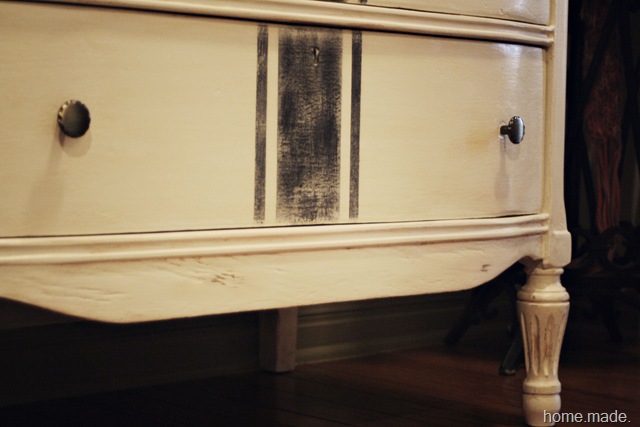
I love vintage textiles, and found my inspiration for this dresser in the rustic beauty of striped French grain sacks.  The simplicity of the design is timeless… and that’s what I wanted to bring to this piece.  After sanding and priming, I painted the dresser with two coats of Martha Stewart’s Glass of Milk (color-matched with Glidden Paint).  Once dry, I taped off my lines and dry-brushed the stripe (Martha Stewart Wrought Iron).  I then lightly distressed the surface with sandpaper and added a burnt umber glaze for patina.  New antique brass hardware (98 cents a piece!) added a nice finishing touch.
031 copy
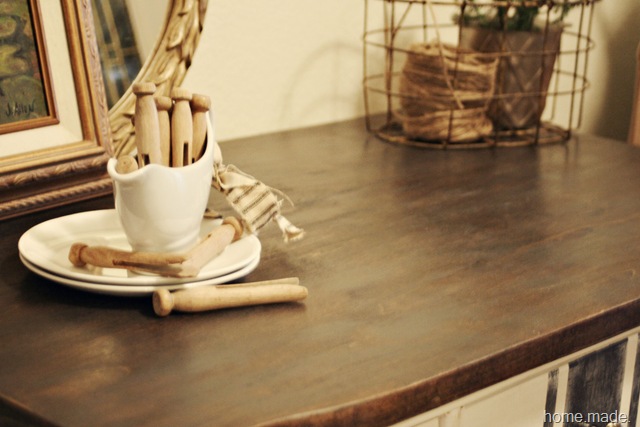
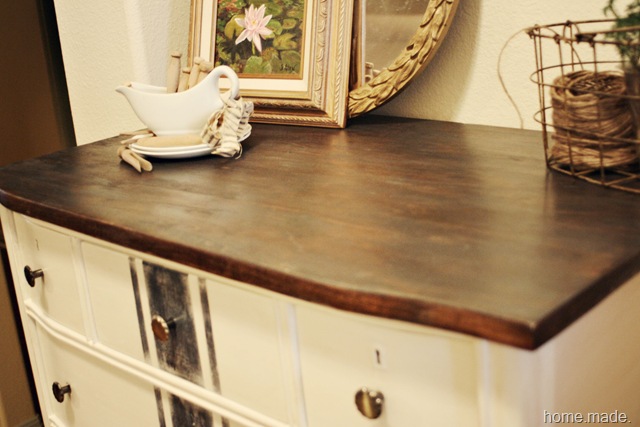
My plans of staining the wood top were foiled when some hidden leftover paint decided to peek through my walnut stain… I didn’t want to chance sanding the wood too thin so I decided on another plan.  I dry brushed the wood top with the Wrought Iron paint and added a polyurethane finish, buffed to a soft sheen.  The end result was a nice, weathered effect with a smooth as glass finish.
050 copy
I’m quite excited about this new dresser… and it’s new home in my front entry, a great reminder that it is possible to not only make do with old items, but to make them beautiful as well.
048 copy
And now that the excitement of OMTWI is nearly over (winner announced tomorrow!)… I can refocus on the many other works in progress around here: namely, finishing up with painting my living area, spreading the love with some Valentine’s décor, and perhaps stenciling a wall or two (or three or four?).
032 copy
Oh, and let’s not forget devouring the neverending supply of holiday-appropriate Hershey kisses in between aforementioned projects, shall we? 
It’s good to be home.made.

Tuesday, January 24, 2012

One Month to Win It - Final Round!

This week marks the final week of:


Photobucket


It's the furniture round, and quite possibly my favorite project yet!

Head on over later to cast your vote!

Monday, January 23, 2012

100 Follower Giveaway - Redraw!!

I never heard from the first winner, so another name has been chosen!

Congratulations to Pam of Love My Country Home!  Pam, I've emailed you!

My Photo

Sunday, January 22, 2012

On Being a Martha... and my Word for the Year

Have you ever realized that when God wants you to listen to Him better, He keeps repeating the same message to you over and over and over... until He's finally got your attention?

Lately, it seems He's been sending a certain story my way... a story that has been mentioned in my church, in my bible study, in my daily devotional email.  

It's the story of Mary and Martha.

I have to admit that I am so convicted by this story because... well,

I am a Martha.

Many days, I am so consumed with managing my list of to-dos, worried about my homekeeping, and overwhelmed by the general busy-ness of life that I tend to miss out on the important things: my faith, my husband, my children.  And while I completely enjoy spending time working on projects and my home, sometimes I need to choose what is better.  I need to be a Mary.

With that said, my word for 2012 is not so much a what as a who:

Mary

This year, I strive to be more like Mary, ignoring the fact that the house is dirty and the dishes aren't done so I can choose what is better and focus on all I need.  My Lord, my man, and my sweet chicks.

Don't get me wrong.  Being a Martha is not a bad trait... it's what makes us good hosts, good homekeepers, and good managers of our families.  It's also what makes us so busy with being busy that we might miss out on some special moments because we are distracted, and worried, and upset.

But Mary... she didn't allow herself to be distracted when the Lord came to her home.  She knew what was important, and it wasn't being a good hostess.

So, this year, my goal is to be more like Mary, while balancing out the Martha aspects that innately are part of me.

How about you?  Are you a Mary or a Martha?

Saturday, January 21, 2012

{Tutorial} Love Bunting Necklace

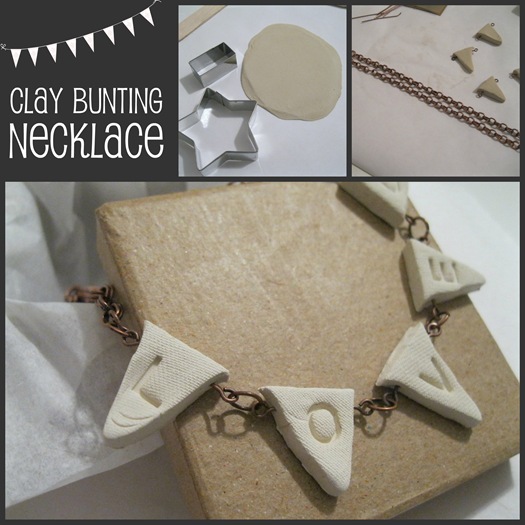
Here it is… the tutorial for my OMTWI clay bunting necklace!
bunting necklace

You Will Need:

  • Air-dry clay
  • Star cookie cutter, Rectangle cookie cutter (or knife)
  • Jewelry findings (eye pins, chain, jump rings, toggle or other closure)
  • Jewelry tools (wire cutter, pliers)
  • Alphabet stamps

Instructions:

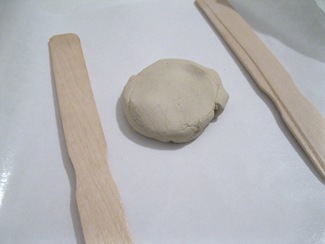
  • Roll air dry clay onto nonstick surface (clay mat or wax paper).  I roll mine between two wooden sticks so the thickness is even.
005
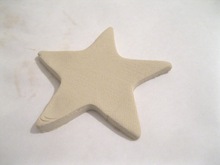
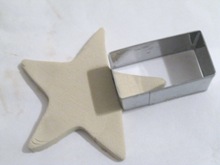
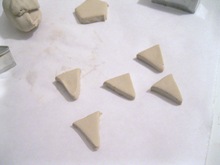
  • Next, take your star cookie cutter and cut out a star (You’ll need to repeat if making more than five bunting pieces.)  Use a straight edge of your rectangle cookie cutter or knife to cut the triangle tips away from the star.   
014015016 
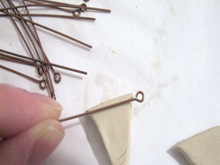
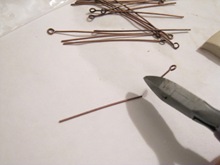
  • Now take your eye pin and cut with wire cutter so the pin is just long enough to meet the middle of your clay piece.  Insert into side of clay, being careful not to poke through the front or back!
018019020
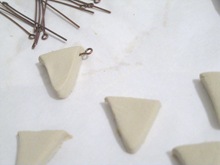
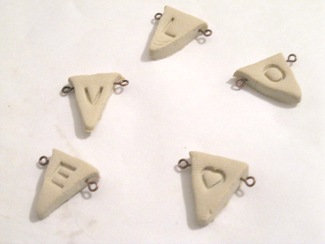
  • Repeat this step for all of your pieces.  Stamp your impression into clay pieces (don’t press too hard so as to not flatten out the clay).  Allow to dry as per instructions (at least 24 hours).
024
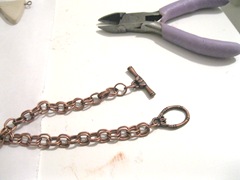
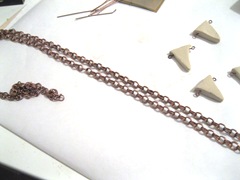
  • Now it’s time to work on your chain.  Attach closure pieces to chain ends with a jump ring.  Lay this on your neck to figure out where you want the bunting portion to lay on your chest.  Trim chain links off as necessary.
023022
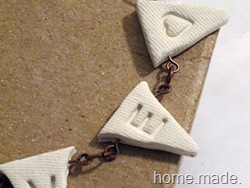
  • When clay pieces are dry, attach bunting pieces together with jump rings.  Then attach end pieces to chain with jump rings (I used two per side for a little more give).027025
And that’s it!  For extra customization, how about stamping your children’s initials, or maybe your wedding date, or how about a special number for a special birthday girl?
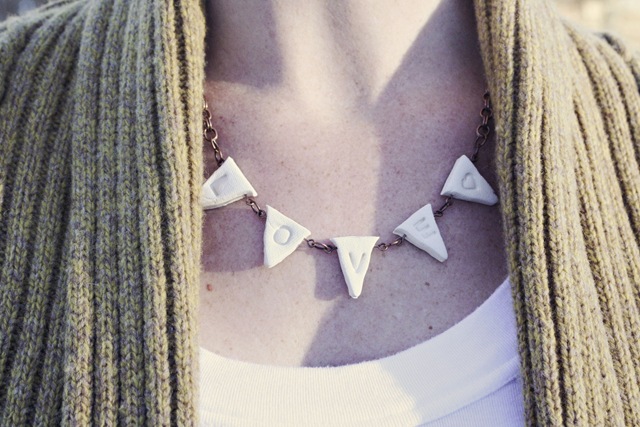
Me?  I chose love… to celebrate the day devoted to the sentiment.
078 copy
Hope you enjoy – now go make one today for your special valentine!

Linking up here:

Friday, January 20, 2012

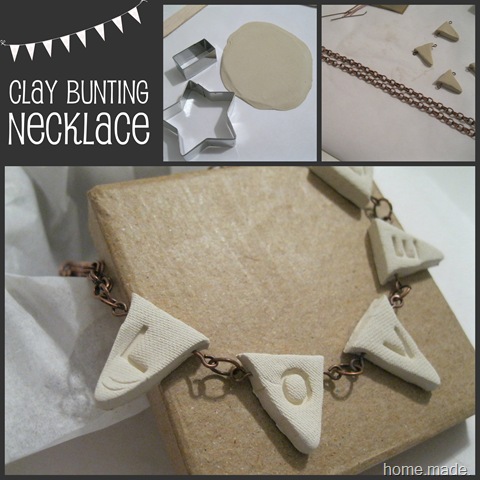
Clay Bunting Necklace

Did you guess this was my project?

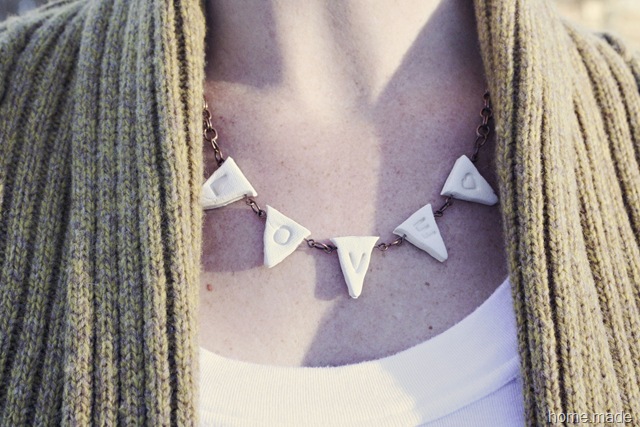
The challenge this week was to create a bunting or banner; to me, a bunting is usually associated with some type of celebration.  With Valentine’s Day quickly approaching, I thought it fitting to make a bunting to celebrate none other than LOVE (I’m a sap like that).  And where better to display a love bunting than near to your heart, right?

bunting necklace

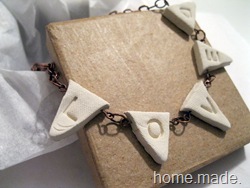
Using air-dry clay, some cookie cutters, and jewelry findings, I created a clay bunting necklace.  The bunting pieces were fashioned from the star tips, stamped with L-O-V-E, and fitted with eye pins.  Once dry, the bunting was strung together with jump rings and attached to the coordinating chain.  (The full tutorial will be on the blog this weekend.)

I love that this project can be adapted for many types of buntings… maybe a number signifying a birthday age, a year for a graduate, or perhaps a date for a wedding?

078 copy

For now… I’ll stick with love.  It is all you need anyway.  ;)

Click over to One Month to Win It this morning to see if I'm sticking around for the final round!

Wednesday, January 18, 2012

Winner Winner!

A little late, but better than never, right?

The winner of the 100 follower giveaway is...

[227468_10150187064991939_602681938_7097608_7038838_n.jpg]

The Noyce Family Adventures!

Honesty, I don't have a way to contact you - I have no email for you nor will your blog let me comment... so please contact me ASAP!

If I don't hear from the winner by Sunday, I'll draw another name.

Thanks again everyone for following - You.  Are.  Awesome.


*** If you haven't voted yet, head over to One Month to Win It to do so!

Monday, January 16, 2012

99 followers... will you make it 100?

***Update:  Woohoo!  We made it to 106 today!!  Thanks so much and welcome to my new followers - winner of custom clay tags to be announced tonight!


I can't believe we've almost made it to 100 home.made. followers!!

If you remember a while back, I posted about a 100 followers giveaway... and I'm ready to make some custom clay tags for someone soon!  We've only got one more person to go and then all of my fabulous followers are entered into a drawing for six custom, handmade clay tags.

Here are a few I recently added to the shop...


Your custom tags can be round, heart, rectangular, star... you name it.  We can finish it off with a special stamp or word or name... whatever you want.  It's my small way of saying a big THANK YOU to everyone who visits my litttle creative corner.

So, who will be the 100th follower to get this party started?!

Friday, January 13, 2012

Sheet Music Chalkboard Tray

Well folks... I made it through to Round Three!  This was my project for this past week's challenge...

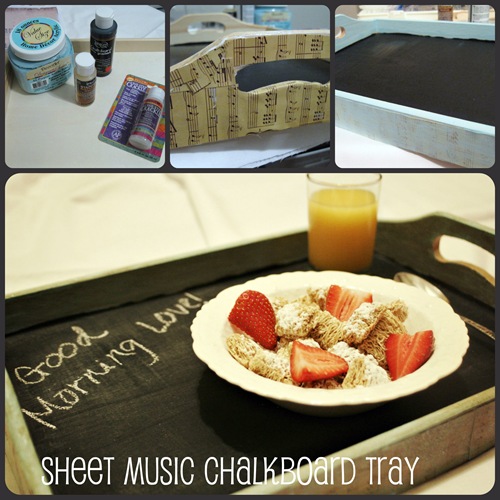
This week’s challenge was to use DecoArt products.  Since I have a fondness for all things vintage, I decided to mix a few DecoArt products to create a time-worn look for my Sheet Music Chalkboard tray.
smct 1
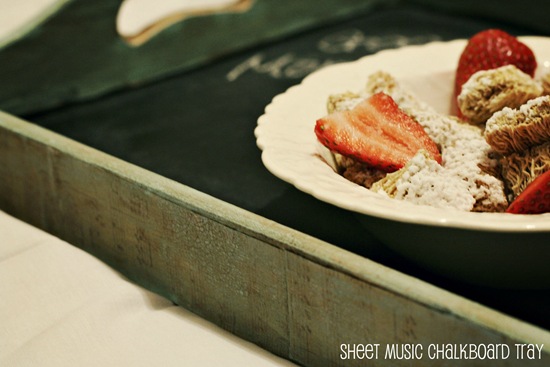
I painted the tray interior with two coats of DecoArt’s Americana chalkboard paint and decoupaged the exterior of the tray sides with strips of sheet music.  Then, I lightly brushed DecoArt’s sky blue acrylic paint to the interior and exterior of the tray sides (over the sheet music).  Once dry, I applied DecoArt’s One-Step Crackle coat, then added some patina to the crackling with DecoArt’s staining medium mixed with some dark umber acrylic paint.
smct 2
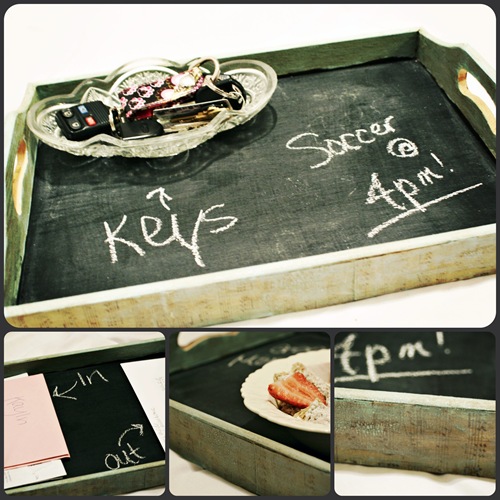
And since breakfast in bed is not quite the reality around here, I decided to try out my new tray for other purposes… a place for keys and daily reminders… and a makeshift in/outbox for that neverending pile of mail!  It’s also a great place for some coffee table tic-tac-toe…
smct 3
I love the way the sheet music peeks through the crackling blue paint…
Thanks again for allowing me the privilege of crafting with you for Round Two.  I hope you are inspired to play with craft paints in new ways to create beautiful, useful items for your home.
Oh… and you know I don’t want to go home yet, so your vote would mean the world to me!
Best of luck to all of the contestants!


Linking up here:
Tatertots and Jello
Show and Tell Saturday
Saturday Spotlight

Monday, January 9, 2012

One Month to Win It - Round Two

Get ready for Round Two of OMTWI, starting tomorrow!

This week, the contestants were challenged to create a project with DecoArt products.  I can't wait to see what everyone's come up with - will you be able to tell which is mine?!

Make sure you head on over and vote tomorrow...

Saturday, January 7, 2012

Fabric {Paper} Dolls–Tutorial

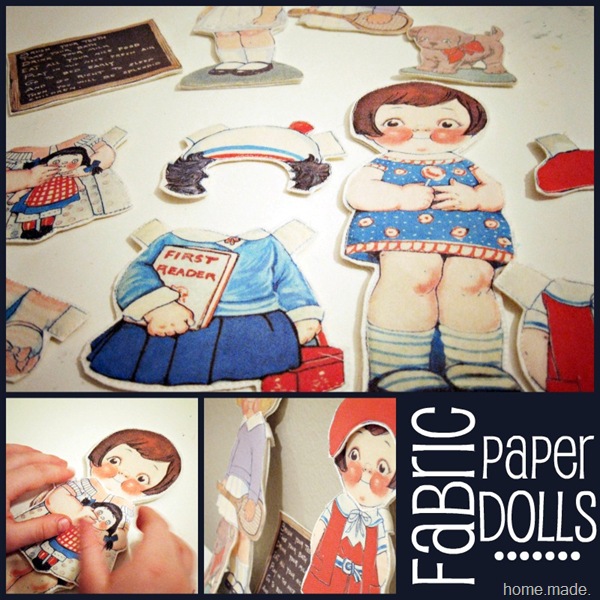
Here it is… the tutorial for my OMTWI Fabric Paper Dolls!

I found my inspiration in the cherubic faces of the Graphics Fairy’s printable vintage paper dolls.  But rather than use paper, which can tear all too easy in the hands of two rambunctious children, I decided to use fabric!

Paper Dolls

What You’ll Need:

  • light colored fabric (I used white cotton twill)
  • Freezer paper
  • Iron
  • Inkjet printer
  • Felt (1 8x12 sheet per printed fabric sheet)
  • Stiffened felt
  • Heat n Bond (or similar fusible applique interfacing)
  • Fabric glue
  • Velcro

Instructions:

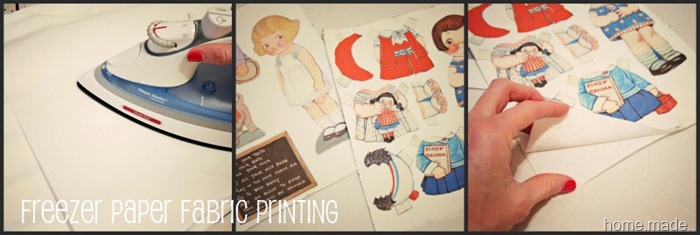
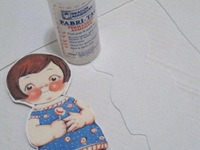
  1. Set iron to warm setting.  Place fabric right side down, then place freezer paper on top with waxy side down.  Slowly press over freezer paper until it fuses to the fabric. 
  2. Cut your fabric/freezer paper to desired printing size (I did 8.5 x 11).
  3. Load fabric/freezer paper into printer tray, being sure to have fabric set correctly for printing.  (You may need to mark a piece of paper and print a sample to be sure.)  Print image as if you were printing on regular paper.
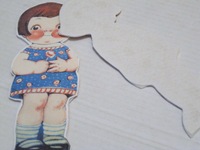
  4. I let my prints sit out overnight just to be certain the ink was dry.  Then, just peel off the freezer paper portion and discard.
freezer paper printing
  
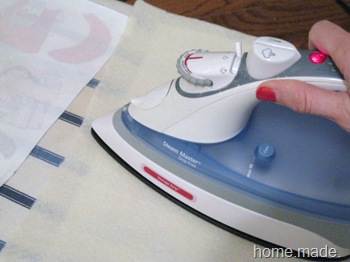
5.  Bond your applique interfacing to the wrong side of your printed fabric, then to your felt.

008
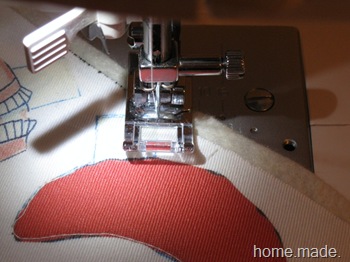
6.  Next, sew around the outlines of your doll pieces with a straight stitch.  *Note* For those of you who don’t sew, this step is optional, since your fabric is already fused.  The stitch is more for decorative purposes.  (You’re welcome.)
010
7.  At this point, you’re ready to cut around your doll pieces.  You’ll want to use scissors that are good for fine handiwork with all of the teensy pieces – I used my fave CutterBee scissors.
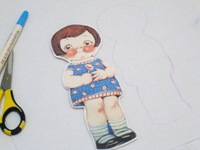
8.  Trace the outline of your doll figures onto stiffened felt.  Cut out just inside your tracing outline.  Using fabric glue, glue to back of doll figure.
 011012013
9.  I don’t have a picture for this next step, but it’s super easy.  Cut out a tiny piece of velcro (about the size of a pencil eraser) – secure the hook side to doll clothing tabs with a small dab of hot glue.  Try your clothes on your doll and make a mark where the velcro meets when the tab is folded around the doll – hot glue the soft velcro side on this mark.
~Velcro placement will vary based on the clothing pieces that come with the doll image.~
10.  Now, it’s time to play!

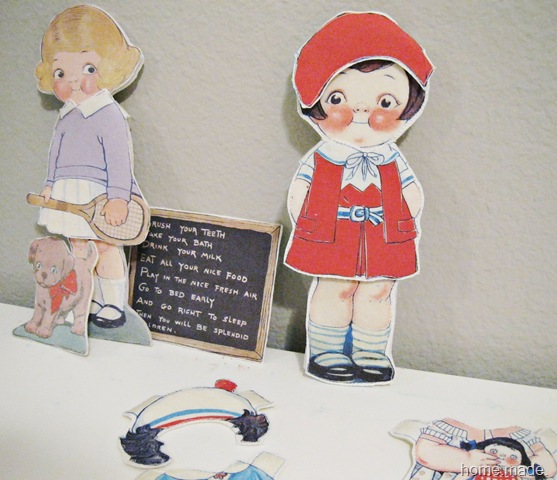
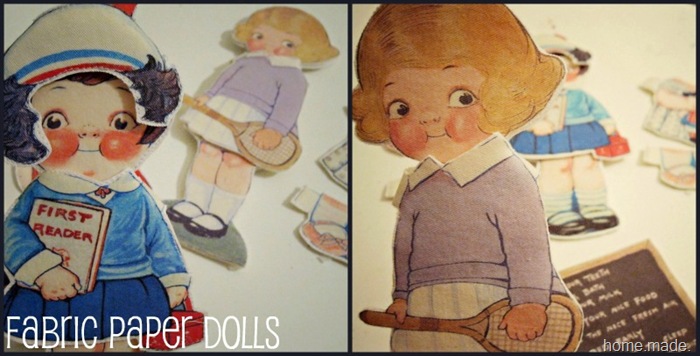
fabric paper dolls

I adore the vintage images of these sweet, rosy-cheeked, wide-eyed little girls and hope you’re inspired to make your very own Fabric Paper Dolls (whether for you or for that special little person).  I will warn you… be prepared to put up a fight with your children for these cuties!

Linking up with these fab ladies:
Tatertots and Jello
Show and Tell Saturday
Positively Splendid


Wow Us Wednesdays
Strut Your Stuff

LinkWithin

Related Posts with Thumbnails