


Monday, January 31, 2011
Trashbag for your Car Tutorial... on Mandipidy!!
Mandy of Mandipidy is featuring my tutorial today as part of her My Readers Are Crafty series! Hop on over and say hi - you won't want to miss her tutorials, her DIY blog makeover tips, or her little shop, full of crocheted goodies!
Sunday, January 30, 2011
{TUTORIAL} Reversible, Multi-Occasion Felt Bunting!!
Drum roll please..........

I finally completed the tutorial *ahem* craft documentary I've been working on for the past couple of weeks: a Reversible, Multi-Occasion Felt Bunting! You see, I love me some fabric buntings but I'm a busy girl. Although I'd love to make a brand new bunting for every occasion or holiday that comes along, I just don't have the time to do that. So, I decided to make a reversible bunting that allows you to switch out the message using your favorite printables... I hope you enjoy it as much as I do!


I finally completed the tutorial *ahem* craft documentary I've been working on for the past couple of weeks: a Reversible, Multi-Occasion Felt Bunting! You see, I love me some fabric buntings but I'm a busy girl. Although I'd love to make a brand new bunting for every occasion or holiday that comes along, I just don't have the time to do that. So, I decided to make a reversible bunting that allows you to switch out the message using your favorite printables... I hope you enjoy it as much as I do!

What You'll Need:
Felt, two colors, 1 yard each
Stiffened felt, one 9x12 sheet
Double fold Bias Tape Quilt Binding (7/8" wide, 3 yards)
Mod-Podge Clothespins (tutorial from the Accidental Crafter)
5" square printable banner letters (mine are from The TomKat Studio Mod Glam Valentine Collection)
Ready? Here we go!
1. Decide what message you want your bunting to say - the number of letters = how many finsihed squares you'll need to have. (My message required seven...)
2. Cut 7"x7" squares from each color of felt. (You will have two different color squares for each letter.)

3. Cut 1"x1" squares from the stiffened felt. You will need two of these for each piece of felt. Next, cut each square in half diagonally so you're left with two triangles.
4. There are two ways you can do this next step. The first way is to measure down and in 3/4" from each corner and mark with an erasable pen, being sure to extend the lines so they cross in an "X".

You can also do it this way, what I call the "cheater way"... Cut out a 3/4"x3/4" square of the stiffened felt and line it up with each corner of the felt, drawing your line to extend as an "X".

5. You will then line up your triangles within the inner X marking like so:

6. Do this for all four corners.

7. Next, sew around the outer edges of each triangle, leaving the long edge open (this creates your "photo corner" to hold your printable). You can use any stitch here that you'd like, but after trying a few different stitches, this blanket stitch was my favorite.

Note: for this step, there's no need for pinning. The stiffened felt stays put pretty well by itself. Just hold the edge with your finger to keep it from shifting as you sew.

8. Repeat this process for each felt square, then tie and trim loose threads.

9. Once all of these are done, you'll be sewing together your finished squares. Take one square of each felt color and place them WST, pinning along the seams. Repeat for all squares.

10. Using a 3/8" seam allowance, sew a straight stitch around all four edges. Repeat for all remaining squares, then set them aside.
11. Next, take your bias tape and sew a straight stitch along open seam, using 1/4" seam allowance.


12. Insert your printable letters into the four corners and that's it!
Now it's time to find the perfect place to hang your bunting and put it together! I tied bows at each end and hung them on a hook (Command Strips rock!) Space apart your message evenly and secure with your mod podges clothespins - sit back and enjoy!


And when it's time for another holiday or occasion, just switch out your letters and/or alternate colors... Christmas, perhaps? (The TomKat Studio Vintage Rudolph collection)

Or maybe just a simple message you can keep up all year long?

Whatever the message, I hope you express it with this bunting - if you make one, please contact me and send me pics so I can feature your home.made. goodness!
Friday, January 28, 2011
Friday Faves {Calendars}
I don't know about you, but I love calendars, especially in January when a new year begins and a fresh, clean slate awaits you. I have a little bit of an obsession to find the perfect planner, so it's not unusual for me to go through several versions in a year. I thought I'd save you a little trouble by showing you some of my faves in the blogiverse... happy planning!
This clipboard calendar from My Computer Is My Canvas is something I saw on Tater Tots and Jello. I love that you can make it your own by decorating your clipboard and then adding this great printable!
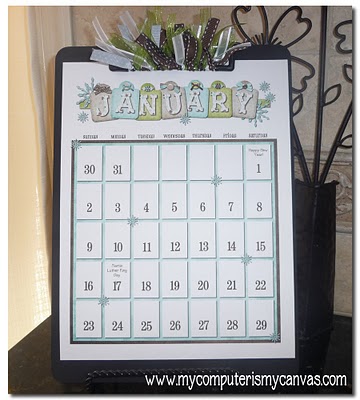 |
| photo credit: my computer is my canvas |
The inadvertent farmer shows you how to make this clever chalkboard magnetic calendar. I love the teeny glass tiles - this would be perfect on my fridge!
 |
| photo credit: the inadvertent farmer |
Look at this awesome dry erase calendar from somewhat simple! I love how she added little sections for notes and to do... I'm thinking I have a picture frame or two that I could convert into one of these!
 |
| photo credit: somewhat simple |
This next one is probably my most favorite and has been added to my "Stuff to Make" list. How awesome is this perpetual calendar from Simply Vintagegirl? She made it from juice concentrate cans... shut. up.
 |
| photo credit: simply vintagegirl |
Hope this calendar fave edition gives you inspiration to start a new way to plan your new year...
Craft documentary progress is great... you should have your tutorial this weekend!
Wednesday, January 26, 2011
Party Planning Underway
It's so hard to believe, but my first born is about to be 6!!
After changing her mind over and over about what theme of party she'd like to have, she finally settled on a puppy party. Cause, you know, that's easy right?! Here are the cupcakes she's decided her mama must make for her:
 |
| photo credit: Hello Cupcake |
With the help of my lovely sister, I'm up to the task of the pupcakes. No problemo.
Now on to invitations... it's quite difficult to find ready-made invitations for a girl's puppy birthday party, so I decided to browse my favorite handmade mall: Etsy. I heart Etsy. Look at these great finds!
This first one is from Etsy seller carvecsmom. I never thought I'd be able to find a puppy party invite that was also girly. Isn't it fantastic?!
 |
| photo credit: carvecsmom |
Love this one as well from loralangdesigns. It's not only a puppy party invite... it's a chihuahua puppy party invite! With a tiara!!
 |
| photo credit: loralangdesigns |
Now that the invites are taken care of, how about some puppy party treats?
I love these puppy paw crayons from LilDoodlers. I almost want to make myself a goody bag so I can have some!

And if you don't want the paws, you can have the whole pup!
 |
| photo credit: LilDoodlers |
And what little girl wouldn't love these little doggy hair clips! *squee* These are from nattiecakesdecor.
 |
| photo credit: nattiecakesdecor |
Or wait... maybe a balloon doggy necklace from claygoddess??
 |
| photo credit: claygoddess |
And then toss in a little puppy lollipop from SweetLollipopShop and it's a treat bag that's definitely no doggy bag!
 |
| photo credit: SweetLollipopShop |
Who could forget a special puppy outfit for the birthday girl? I adore this dress from
SummerHouseDesigns. A. mazing. The best part? This can be worn on many other occasions! It's so beautiful...
 |
| photo credit: SummerHouseDesigns |
So, whaddya think? There are some pretty incredible, talented peops out there and it makes me all the more excited to get things planned. I'll be using this party planner timeline from Martha - it helps keep me on track to make sure I remember to do everything to make this puppy party something to bark about!
Sunday, January 23, 2011
Priorities and a Sneak Peek
I've got a tutorial in the works for you guys, but if any of you are working moms, you understand how sometimes there's just not enough time in the precious weekend to get it all done. And if any of you are moms, period, you get that sometimes there's a certain child that WILL NOT TAKE A NAP!, and sometimes there's a certain child that can not nap due to aforementioned child that WILL NOT TAKE A NAP!, and that sometimes... I need to spend mommy-daughter time with she who will not and she who can not.
You get that, right?
Of course you do.
There are times when I get in a good crafting groove and I sew and knit and cut and paste and design and take pictures and blog... and I get so caught up in the process of creating that I get frustrated, and sometimes angry, when I am interrupted.
And then I feel so guilty.
It happened just today. I got frustrated... and then felt guilty.
It's difficult having to put projects aside, especially when I am in the middle of a crafting documentary (aka tutorial - sounds so important the other way, right?!). At the end of the day though, I am a mama, and that is more important than any of my beckoning projects or any beautiful fabric or any idea that is brewing in my brain. At the end of the day, I want my daughters to remember me playing outside with them instead of putting in a movie so mama can get just a little more "work" done.
You get that too, right?
So bear with me on thetutorial craft documentary posting. It might just take me the rest of the week to get it all finished and chronicled. I can give you a sneaky peeky, though... wanna see?
Of course you do. *squee*!


Nothing like a teaser post to start the week!
You get that, right?
Of course you do.
There are times when I get in a good crafting groove and I sew and knit and cut and paste and design and take pictures and blog... and I get so caught up in the process of creating that I get frustrated, and sometimes angry, when I am interrupted.
And then I feel so guilty.
It happened just today. I got frustrated... and then felt guilty.
It's difficult having to put projects aside, especially when I am in the middle of a crafting documentary (aka tutorial - sounds so important the other way, right?!). At the end of the day though, I am a mama, and that is more important than any of my beckoning projects or any beautiful fabric or any idea that is brewing in my brain. At the end of the day, I want my daughters to remember me playing outside with them instead of putting in a movie so mama can get just a little more "work" done.
You get that too, right?
So bear with me on the
Of course you do. *squee*!


Nothing like a teaser post to start the week!
Saturday, January 22, 2011
Show and Tell Linkup
I'm linking up my Valentine Pom Pom Wreath with Lorie over at Be Different Act Normal for Show and Tell Saturday. You should head over there and check out all of the creative linkups!

It's a beatiful day so I'll be outside with my chickies today... have a fantastic Saturday!
Friday, January 21, 2011
Friday Faves! Valentine Edition
Happy Friday to you! I don't know about you, but I am so excited that it's Friday! To kick off the weekend, I'm sharing some of my favorite Valentine tutorials, the first edition of a new weekly roundup of tutorials: Friday Faves! Maybe they'll spur your creativity to deck your halls with love this weekend!
I'm crushing on this Wool Felt Valentine on Sew Mama Sew. I've got a thing for birdies, what can I say?!
This Valentine chair backer from Sew What's New is on my project to do list... what better way to surprise my chickies with their V-Day loot?!
I'm crushing on this Wool Felt Valentine on Sew Mama Sew. I've got a thing for birdies, what can I say?!
 |
| photo credit: Sew Mama Sew |
Never one to disappoint, the Purl Bee delivers with these Crocheted Valentines.
 |
| photo credit: The Purl Bee |
I still love One More Moore's Valentine Ruffle Apron...
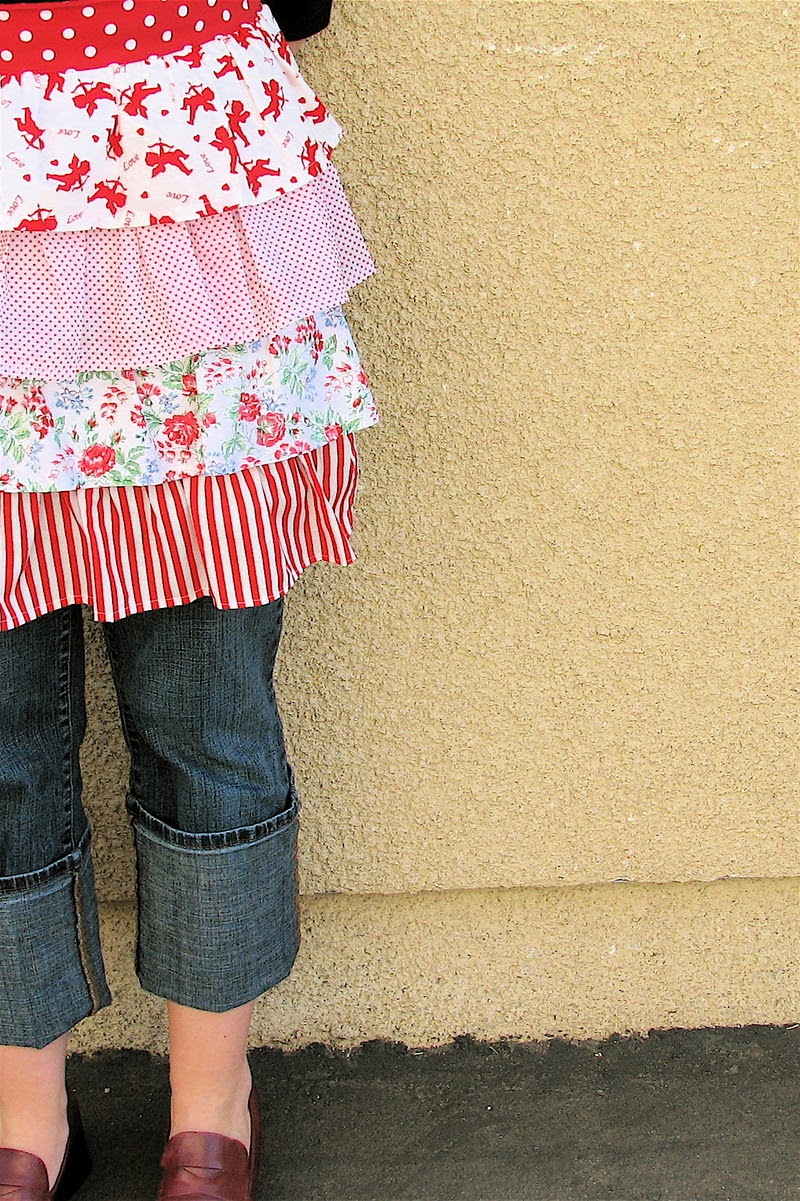 |
| photo credit: One More Moore |
Crazy Domestic put a ruffly twist on the Valentine topiary - her light pink version is to die for!
 |
| photo credit: Crazy Domestic |
This Valentine chair backer from Sew What's New is on my project to do list... what better way to surprise my chickies with their V-Day loot?!
 |
| photo credit: Sew What's New So there you have it! Some of my favorite tutorials for the only holiday dedicated to L-O-V-E! Now go get crafting! (And stay tuned for a home.made. tutorial here next week!) |
Tuesday, January 18, 2011
Valentine's Pom Pom Wreath
In the midst of the Yarn It Forward giveaway, I spent my weekend continuing the pom pom obsession that began before Christmas... and turned that obsession into a Valentine's wreath! It makes my front door happy and makes me *smile*!


I achieved the various thicknesses by wrapping more yarn on some poms and less on others. To add interest, I made poms using two different yarns, wrapping each together. I love the way the thick white yarn poms look with the sprinkle of thinner pink and red yarn. (Please excuse the not so purty door - I have plans for that door but have to wait for not so wet weather!)


I wish I could tell you I have pictures of the process, but in bad blogger form, I don't. It literally took me forever to accomplish the pom poms between baby girl needing her mama to hold her for nearly 36 hours straight and the girls wanting to make pom poms too!

It's really quite simple. I used a grapevine wreath form that I purchase at Walmart for cheap - then, rather than snip the longer yarn threads used to tie the pom pom together, I used them to tie the poms to the wreath and then trimmed. I used two different size pom pom makers, fyi.

I achieved the various thicknesses by wrapping more yarn on some poms and less on others. To add interest, I made poms using two different yarns, wrapping each together. I love the way the thick white yarn poms look with the sprinkle of thinner pink and red yarn. (Please excuse the not so purty door - I have plans for that door but have to wait for not so wet weather!)

The final touch was one of my heart cookie cutters... a perfect nod to Valentine's Day! It's suspended with, what else, but some yarn! I criss-crossed the yarn at the top of the heart to keep it from turning sideways.
I've got a little more V-Day decorating to do, but am working on it. Here's a cute Valentine subway art printable from eighteen25. I just love all of the free printables! And do you see what's in the background? That's my felt topiary from last year - I salvaged it from the beating it took while moving. I just couldn't bear to let it go...

I'm making some changes with my etsy shop and looking forward to some exciting things in February... I can tell you, the February theme is going to be {HEART}. Here's a peeksy at something I'll be adding to etsy soon - you'll understand the HEART theme in due time...

Stick around for the excitement!
Yarn It Forward - Winners!!!
Are. You. Ready???!!!!
Here are the Yarn It Forward Winners!!
Day One:

Day Two:

Day Three:

Day Four:

and Day Five:

Congratulations to all of you and thanks so much for joining in the Yarning It Forward Fun! I will be emailing you lucky ducks to get your mailing info...

Subscribe to:
Posts (Atom)
LinkWithin


