Thursday, October 30, 2014

Sugar Skull Wreath

I have an obsession with Sugar Skulls... they are such a beautiful representation of the Day of the Dead, a time when deceased loved ones are remembered in Mexican/Aztec tradition.  I think I also have a fondness for Dia de los Muertos because my mother passed away on November 1st, which is when the cultural holiday begins.  I decided to forgo the traditional Halloween wreath this year to pay homage to the Day of the Dead and made a Sugar Skull Wreath.


The idea for this started when I found a paper mache skull mask at Joann's.  I painted it white and then, using a picture I found online as a guide, I hand-drew and painted the skull art.


I wanted a big, fluffy black wreath on which to showcase the skull, so I made my first mesh wreath which was much more difficult than I anticipated.  There is truly an art to working with the mesh and getting the loops just right.


The colorful burlap roses from Hobby Lobby were a perfect addition.  I love how they pull in all the colors of the mask against the black mesh.  I used some leftover orange pom pom trim from my No-Sew Halloween runner as a hanger.


Throw in my turquoise door, a few pumpkins, and some dying mums (geez, will I ever not kill a plant?!) and we're ready to welcome you for fall... 

Linking here:

Wednesday, October 29, 2014

{Work It} Wednesday - Cropped Pants and Heels

Happy humpday friends!  I'm back with the second installment of Work It Wednesday, where I show you my ever-evolving work style that doesn't include ripped up skinny jeans or any of the other ridiculous "work" outfits found on Pinterest.

Today, it's all about cropped pants and heels.


I brought back my fave cropped pants (Gap skinny mini pants) for this look and paired it with a leopard blouse I found at Charming Charlie's (similar), a green cardigan (J Crew factory Clare cardigan), and Vince Camuto nude snakeskin pumps (here, 40% off right now!).

Cropped pants have become my unofficial work uniform, especially since it's still eighty plus degrees in Texas right now... I'm already thinking of ways to incorporate them once it actually gets cooler.  Any ideas for me?

Have a great rest of the week - remember to keep the skinny jeans out of the corporate world!

Thursday, October 23, 2014

DIY Lazy Susan

Whew!  The past week has been a real doozy for me at work so I haven't had a lot of energy in the evening hours... thus I'm just now posting my latest project, the DIY Lazy Susan that I shared in my No-Sew Halloween Runner tutorial.


I've had a dough bowl on my table for a while and while I love it, we had to do a lot of reaching around it when we were passing the salt or getting a napkin.  I thought a lazy susan would be a great solution - and a personalized one would be even better - so I picked up a few things and got to work.


To make your own, you'll need:
unfinished pine circular board (I found mine at Lowe's)
wood stain
sandpaper
paint
stencil
polyurethane
turnstyle hardware (found in cabinet section at home improvement store)


Instructions:

1.  Stain your board your desired color - I used weathered grey from Rustoleum - then sand with a fine-grit sandpaper.


 2. Stencil/draw your desired message.  I used a stencil for my smaller letters/numbers, placing them an inch away from the edge of the wood.  I freehanded the large U as I couldn't get the right size to print on my printer...


3.  Paint lettering.  I hand-painted all letters because I was going for a handpainted look, but you can certainly paint over the stencil if you want.


4. Once paint is dry, coat with polyurethane to protect the finish.

5.  Add turn-style hardware to opposite side of board.


6. I was worried about the turn-style scratching the surface of my table so I added a small piece of adhesive foam (from my craft stash) to pad it.  


That's all, guys.  Super easy, super inexpensive - I think this project cost me around $10.


I'm loving our new lazy susan - it's an addition that meets my criteria of being not only beautiful but also useful.  My girls enjoy spinning it to get their salt and pepper as opposed to reaching around the dough bowl/antlers that used to be in its place - I'll admit that sometimes they enjoy spinning it a little too much but oh well... they're only little for a while, right?

Hope you're having a great week - it's almost the weekend so hang in there!!

Linking here:
The Handmade Hangout
Inspiration Gallery
Inspire Me Please
Link Party Palooza
Show and Tell Saturday
The 36th Avenue

Monday, October 13, 2014

Halloween No-Sew Runner Tutorial

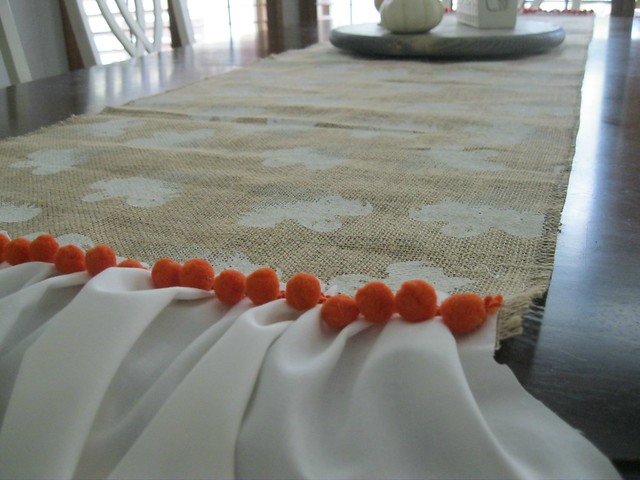
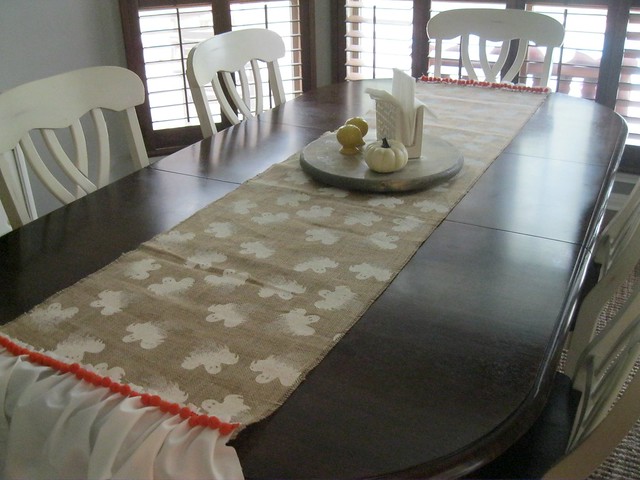
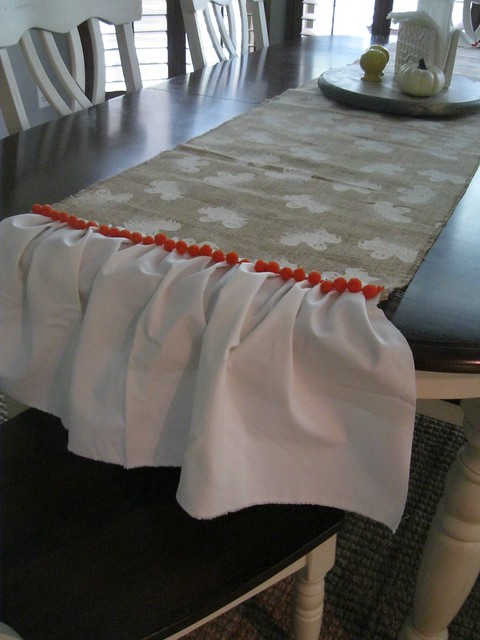
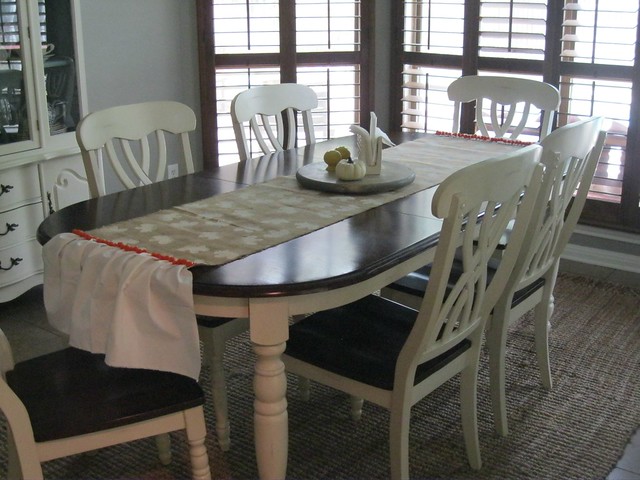
Hey there friends!  Hope you're having a great week so far... can you believe its already mid-October?  I know I can't, which might explain why I'm just now starting to decorate my home for Halloween.  I'm starting with this No-Sew Halloween Runner:


I found this great ghost-stamped burlap at Joann's a few weekends ago and knew I wanted to use it for a table runner.  I had intended to sew it but couldn't get the mojo to bring out the old sewing machine so I used the next best thing... a little hot glue.  My plan is to just spot clean as needed so the glue was a great option here.

No Sew Runner


Halloween No Sew Runner

This runner is super-simple to make:

You'll Need:
2 yards burlap (longer if you have a longer table)
1 yard white muslin (or other fabric)
pom pom trim
hot glue

Instructions:
1.  Cut burlap to desired width.  Mine is 16 inches wide.

2.  Pull burlap threads along long sides to create frayed edge.

3.  Cut muslin to desired length.  Mine is 10 inches long.  Width of muslin should be double the width of your runner.  Mine is 32 inches.

4.  Fold muslin in half to find middle of width.  Hot glue midpoint to the midpoint of the burlap.

5.  Beginning on one edge, secure the fabric to the burlap with glue as you gather in even puckers.


6.  Next, hot glue pom pom trim just under the top edge of the fabric.


7.  Repeat on the opposite edge, and that's it!  Enjoy your runner!

No Sew Runner


No Sew Runner

Halloween No Sew Runner

I'm already loving my new table runner, and I love how easy it was.  I foresee more holiday no-sew runners in my future... I can already imagine some red and turquoise christmas fabric with natural burlap!

I'll be back with another Work it Wednesday post and will be sharing more details on that cute lazy susan gracing my table... make it a great week!

Linking here:
Inspiration Gallery
Inspire Me Please

Wednesday, October 8, 2014

{Work It} Wednesday - Lime and Leopard Work Style

Happy Humpday and welcome to a new series here on home.made. called Work It Wednesday, where I'll show you what I wear to work as I strive to infuse more style into my work wardrobe.

I don't know about you, but I sometimes peruse "work outfits" on Pinterest and I have to laugh, cause unless you work at the mall or in a place with no dress code, most of the looks are unwearable in office.  Ripped skinny jeans... ripped boyfriend jeans... shorts... apparently as long as you pair these with a blazer and heels they are appropriate work attire.

So, since I do have a dress code to uphold, I'll be sharing my looks with you and providing links to similar or the same items.  (No affiliates involved.)  Here we go: my first look is Lime and Leopard.


I paired a fun lime ruffled top (old Nicole Miller from JC Penney, similar) with a white cardigan (old Banana Republic, similar), Gap skinny mini skimmer khakis (here), and Vince Camuto leopard print booties (here).  My bag is from Barrington Gifts - I won a bag giveaway from Cassie at Hi Sugarplum! and have been obsessed with it since.  It's huge and holds everything!

If you have any questions and any request for work looks, let me know!  Have a great Wednesday friends!

Monday, October 6, 2014

How to Remove Lipstick Stains from Clothing

I had a complete freak-out moment last weekend when I went to get my clothes out of the dryer and found this:

That would be an empty tube of lipstick… that made it through an entire cycle in the dryer with some of my favorite clothing!  Noooooo!  Once I regained my composure, I decided that trying to get this lipstick out of my clothes would be a cheaper alternative to replacing them all.  Happily, I was able to get most of the lipstick out so I’m here to share the details with you in case you’re ever in my shoes.

Note: there are not before/after photos for this post.  See aforementioned reference to freaking out.

Here’s what I did:

1. Apply liquid detergent to each (yes, each) lipstick stain.  There will be a lot so prepare yourself for this to take a while.  Rub in detergent to stain with a toothbrush or old towel.

2.  Soak your clothing in the warmest water it can tolerate, either with a pre-soak option in your washer or in a sink/tub.

3.  Follow this soak with a full wash cycle in the warmest water your clothing can tolerate.

4.  Once your wash cycle is complete, inspect clothing for remaining stains.  If stains persist, repeat soak and wash cycle.  (I ran mine through three of these cycles and about 90% of the lipstick stains were gone.)

5.  Before your dry your clothing, make sure you’ve cleaned your dryer of any remaining lipstick residue.  If you don’t do this, you’re likely to end up right where you began.


I was quite ecstatic that I was able to get most of the lipstick out – it was everywhere, y’all.  There were a few items of clothing that didn’t have a lot of success: a few camis and unmentionables made out of a stretch knit material.  Since they go under my clothing, it was no big deal.  My jeans survived, as did some of my favorite tops – whew.  Mr. home.made. would not have been happy about me replacing all of that in one fell swoop.

I hope you’re better than me about checking pockets and you’re never in this situation, but just in case… try this out and see if it works for you before you throw everything out.  Your husbands will thank me.

Happy Monday y’all!